Establishing security for your Dynamics 365 users can be a daunting experience if you do not fully understand how the security is built. Understanding the security architecture in Dynamics 365 for Finance & SCM will help make the security setup for your organization much more straightforward and simple. Once you understand the building blocks of security in D365, your organization can determine a process for configuring security to meet your needs.
The first thing to understand about D365 security is that although it comes with predetermined security roles, out-of-the-box security roles can always be customized or even built from scratch to meet your needs. D365 security is set up as a hierarchy, and the top level of Dynamics security is a security role. A security role is an overall title for the security access that a certain type of employee would have. In Finance and Operations apps, role-based security is aligned with the structure of the business. Users are assigned to security roles based on their responsibilities in the organization and their participation in business processes.
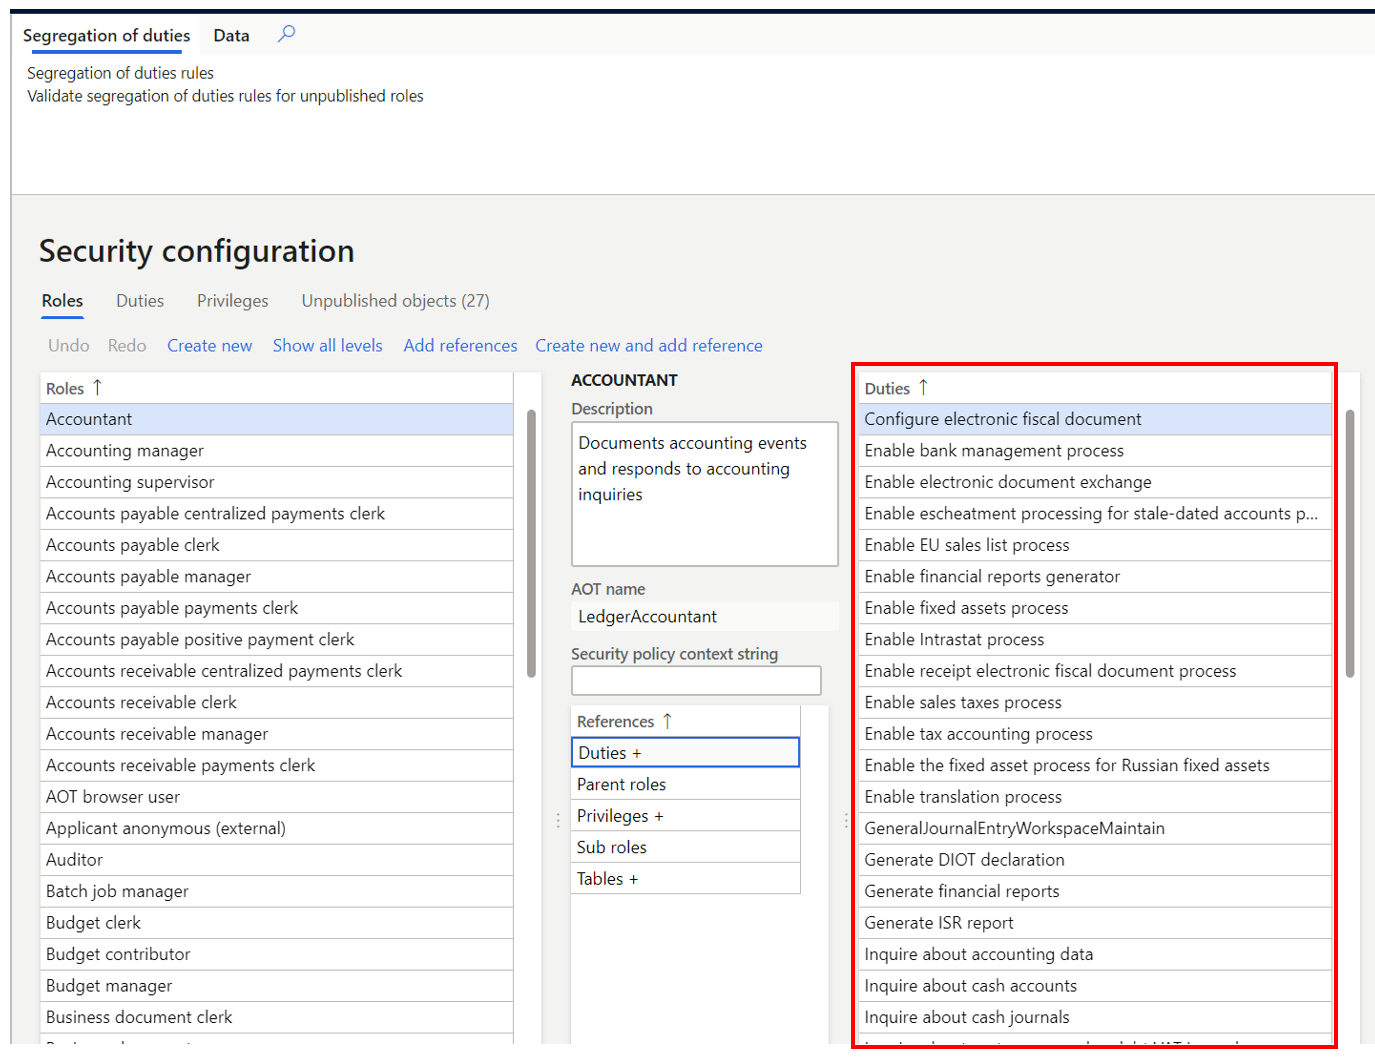
When building a custom role, or when adding duties and privileges to roles, a hierarchy is used to help you find the duties or privileges you need. Permissions represent access to individual securable objects, such as menu items and tables. Privileges are composed of permissions and represent access to tasks, such as canceling payments and processing deposits. Duties are composed of privileges and represent parts of a business process, such as maintaining bank transactions. Both duties and privileges can be assigned to roles to grant access to Finance and Operations. Because rules can be set up for automatic role assignment, the administrator does not have to be involved every time that a user’s responsibilities change. After security roles and rules have been set up, business managers can control day-to-day user access based on business data.
Now that we have a better understanding of the building blocks of D365 security, the best way to learn how to set up security access on a user is through an example. Follow the steps below to create a new security role follow these steps:
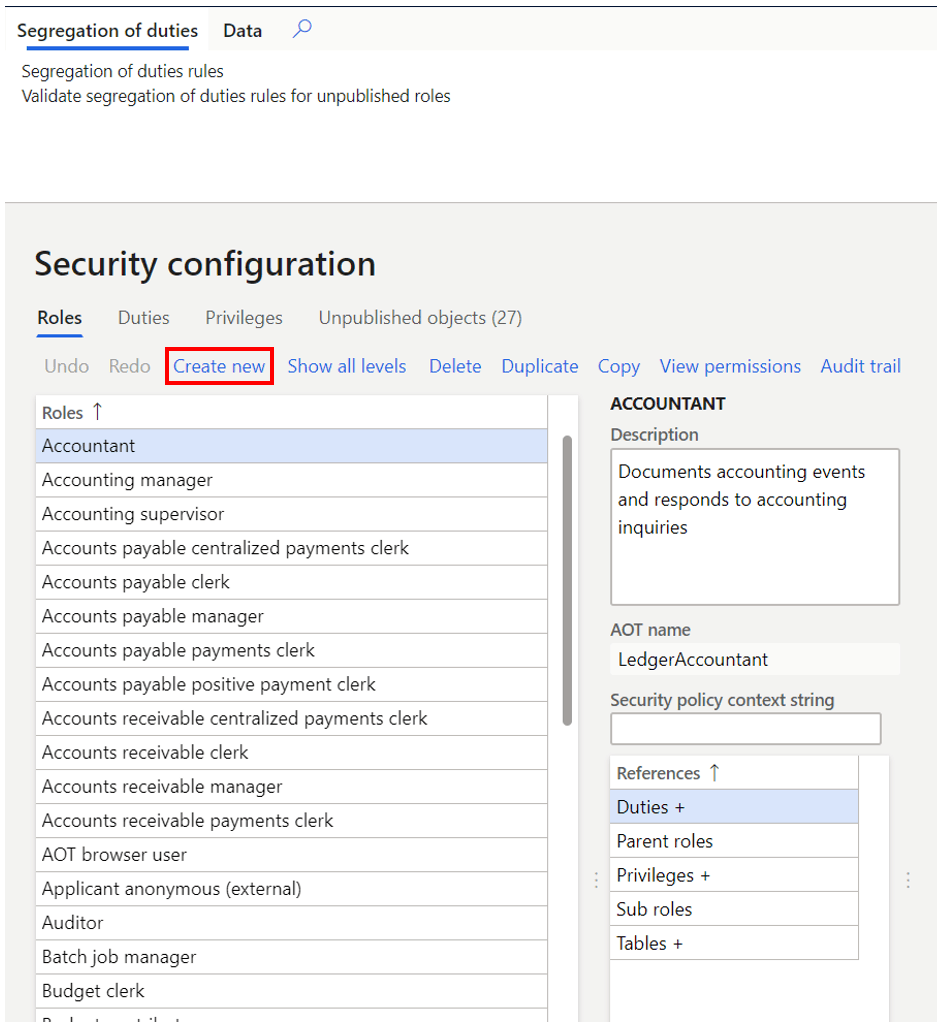
- Navigate to System administration > Security > Security configuration.
- Click the Create new button.
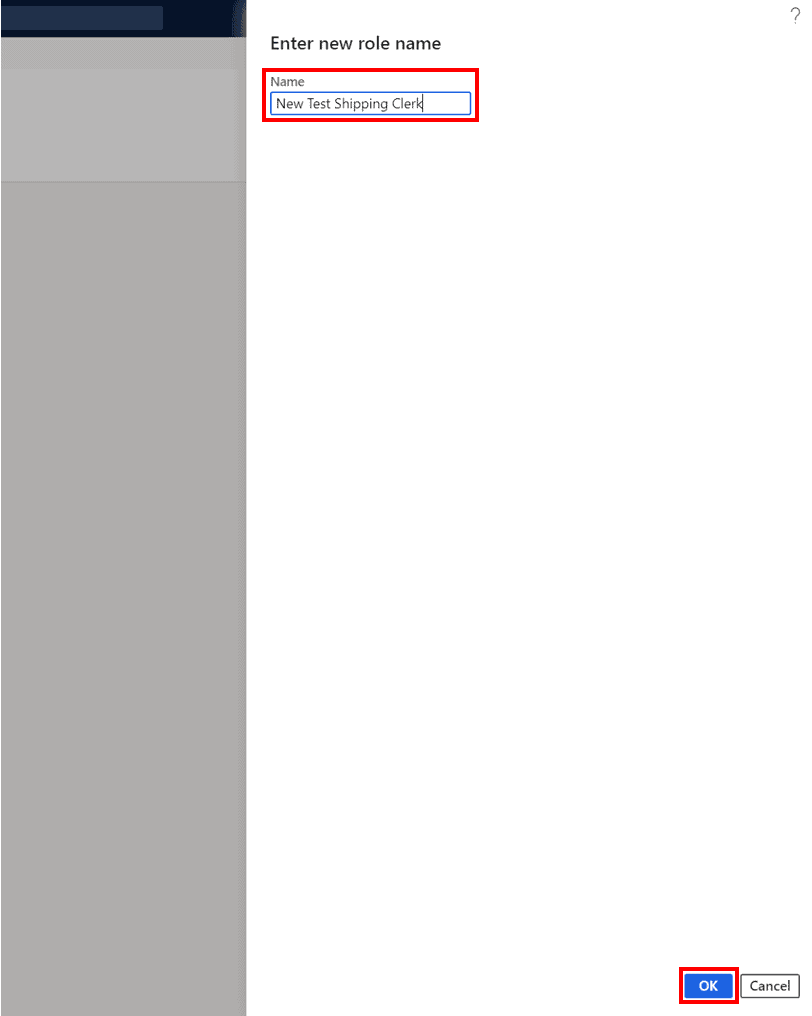
- In the Name field enter the name of the new security role and click the Ok button.
Now that we have created a security role, let’s add some duties to the security role.
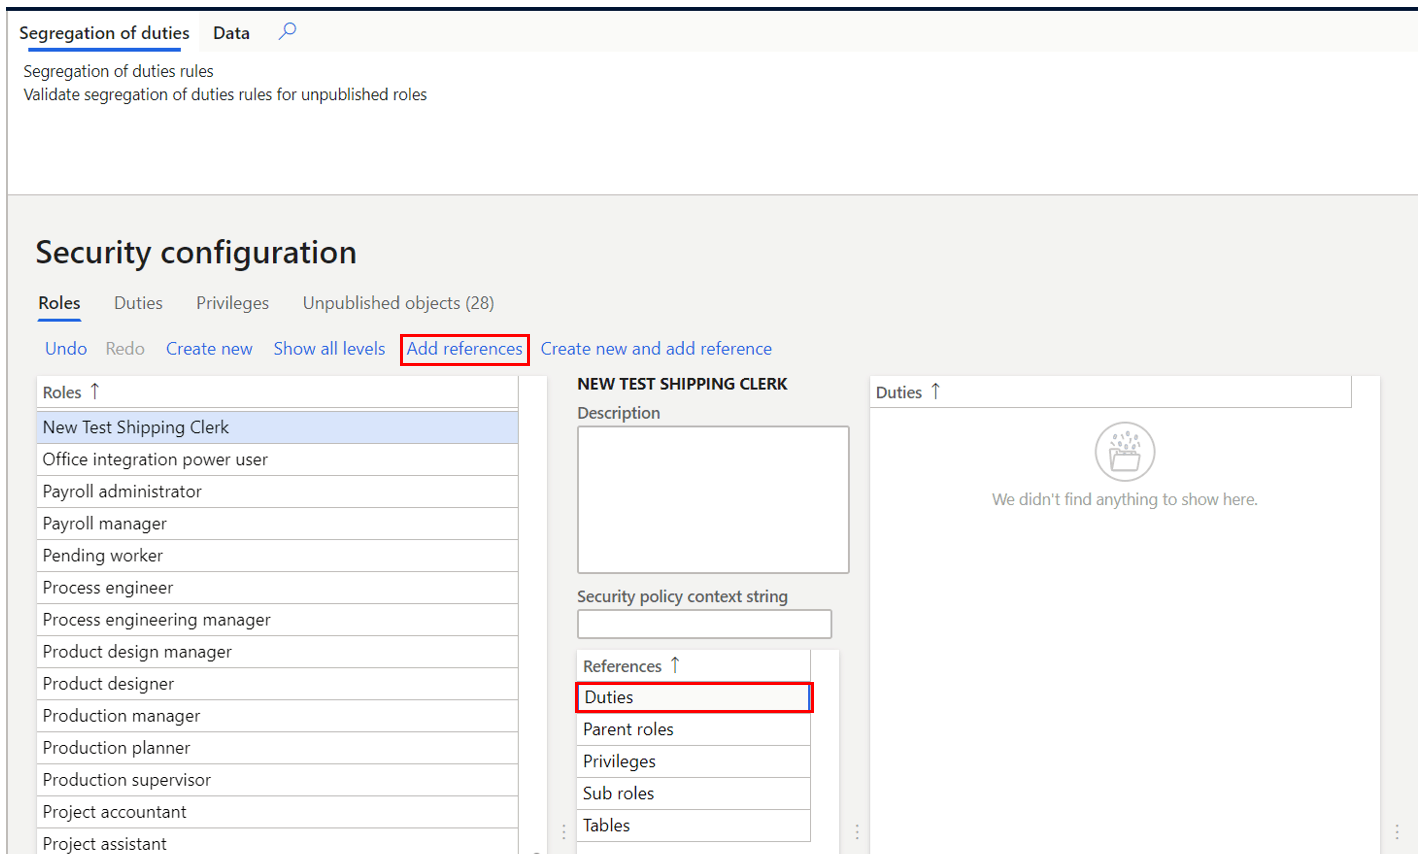
- Find the security role you just created, click on it, and click on the Duties reference in the middle of the form.
- Click the Add references button.
- This will open the duty selection pane. Select the duty you want to add and click the Ok button.

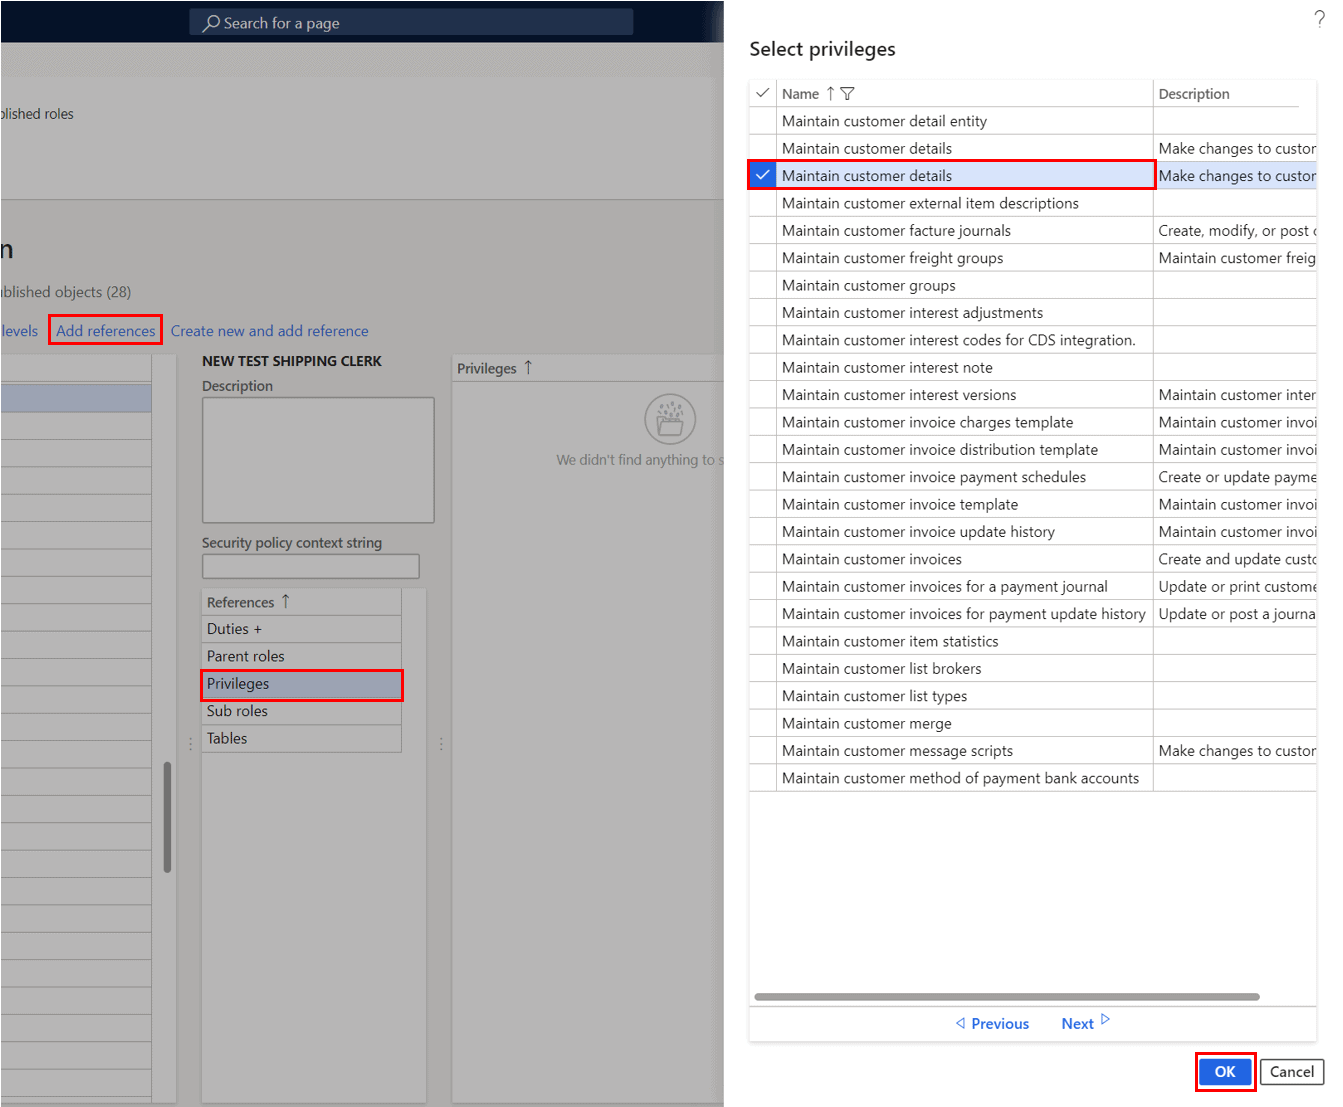
- You can add specific privileges to your duty by clicking the Privileges reference in the middle of the form.
- Then click the Add references button again to open the privilege pane.
- Select the privilege that you want to add and click the Ok button.
Now that we have created the security role, assigned a duty, and assigned privileges to the duty, it is time to publish our security role.
- To publish our security role, click the Unpublished objects tab.
- Find the security role we created, select it, and click the Publish selection.
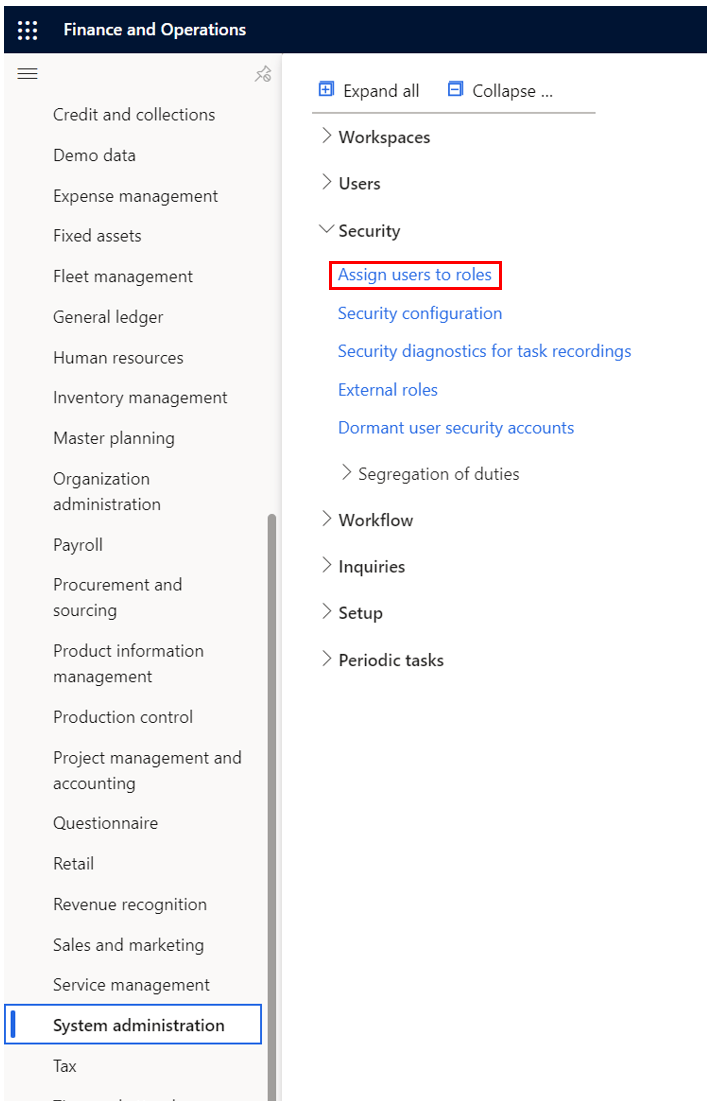
The final step is to assign the security role to a user.
- Navigate to System administration > Security > Assign users to roles.
- In the security role assignment form, find the security role we just created and click on it.
- Click the Manually assign/exclude users button.
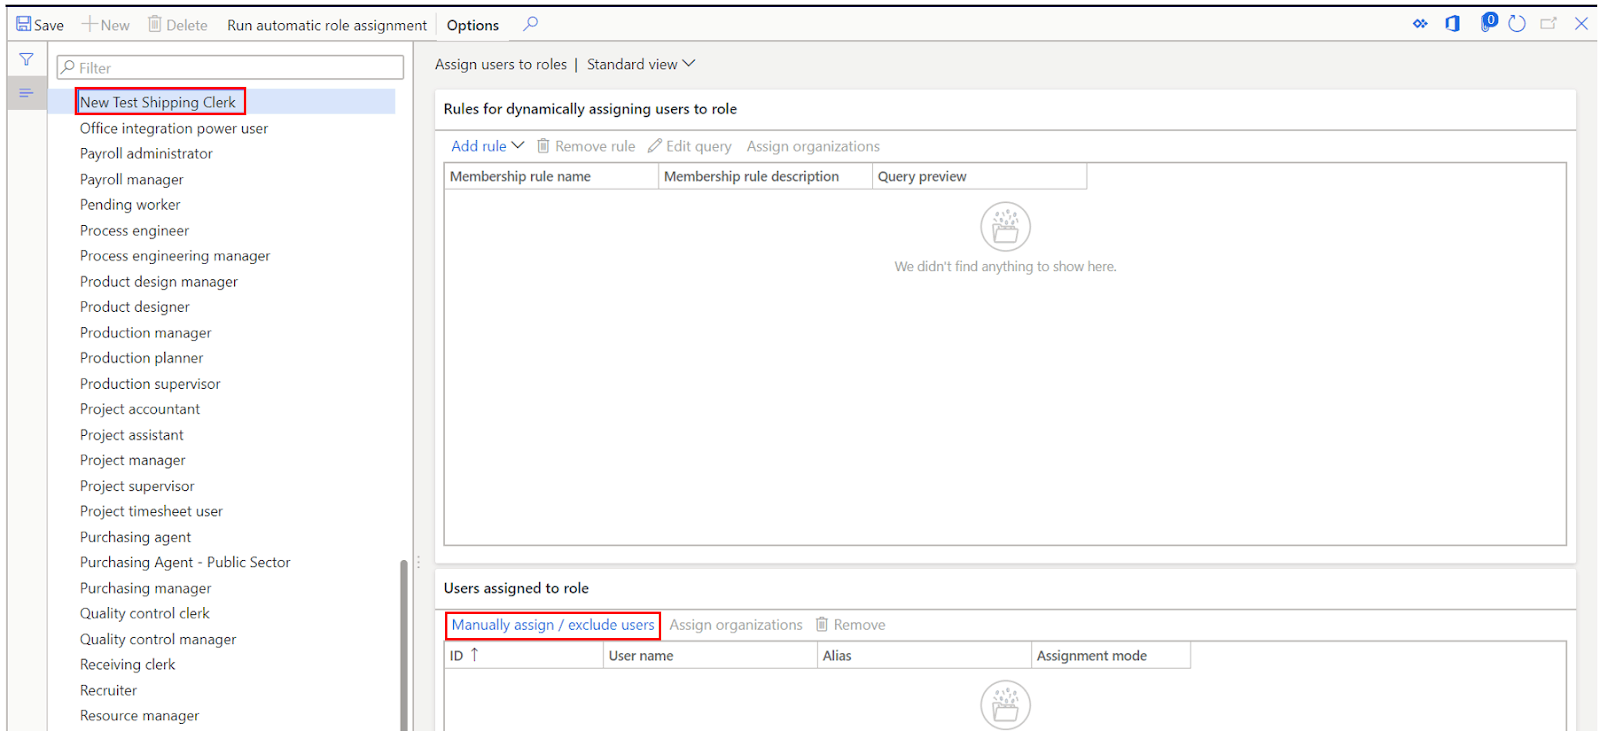
- Here you can click on the user you want to associate with the security role and click the Assign to role button.
In the case that you have a large number of users, it may be tedious to manually assign security roles to users. You can automatically assign users to roles by building a query associated with the security role that will look for users to assign based on user-defined filter criteria.
- To use the automatic role assignment, click the Add rule button.
- In the Select a query list, find and select the desired record. Select the query to use for this rule.
- In the Membership rule name list, click the link in the selected row.
- Select Edit query. Edit the query, as needed.
- Select OK.
- Select Run automatic role assignment.
- Go to Navigation pane > Modules > System administration > Users > Users (ideally in a separate browser tab).
- Review the roles assigned to various users to confirm that the role assignment query was correct. Adjust and re-run if needed.
Hopefully, this helps you to get started with configuring security in your Dynamics 365 environment. One more piece of advice is to understand that you will probably not get security right the first time for every user. Testing prior to going live with D365 is essential to finding security gaps or too much security for a user. If a user is unable to perform a function that they think they should be able to access, it is likely that security is the cause. I would recommend taking access issues from users one by one, and analyzing whether the best course of action would be to add a new role entirely or to modify an existing role on the user.
Next Steps
If you are interested in learning more about security in D365 as well as maximizing the use of Microsoft Dynamics 365 for Finance and Supply Chain Management contact us here to find out how we can help you grow your business. You can also email us at info@loganconsulting.com or call (312) 345-8817.


