


Reviews and corrects ledger-to-subledger alignment in D365 by fixing posting configurations, inventory profiles, reconciliation logic, GL mapping, and critical reporting procedures.
Start Using the Microsoft the Dynamics 365 App for Outlook Today!
Posted on: January 19, 2018 | By: Jim Bertler | Microsoft Dynamics CRM
Authored by: John Hinchy
With the Microsoft Dynamics 365 App for Outlook, email integration with Dynamics 365 for Sales is finally relevant, useful, and productive. The old Microsoft Plug-In was unfortunately unreliable and often a pain to use. It would stall out, run slow, or disconnect from your computer. The Set Regarding function was cumbersome as it forced the user to engage in multiple clicks and searching for the correct person to link the email to in a lookup.
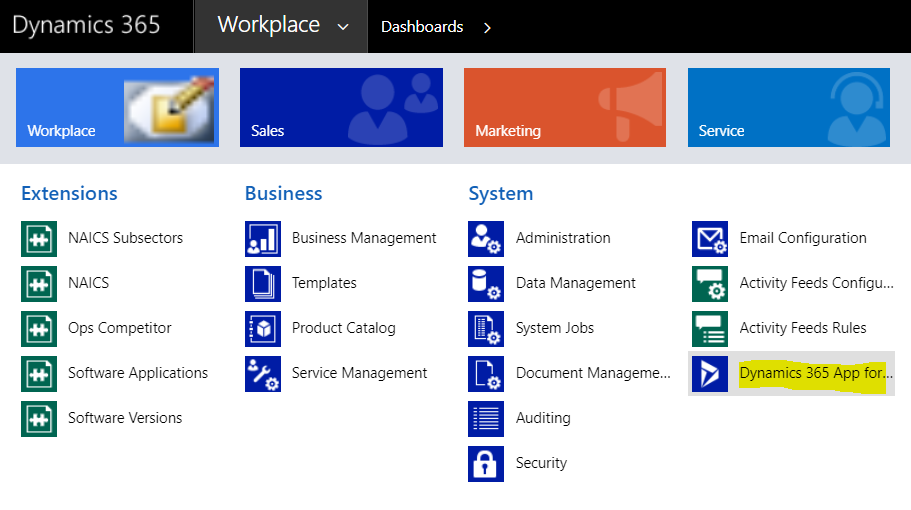
Now, if you have noticed under Settings in your Dynamics environment there is a button for Dynamics 365 App for Outlook. This is a web based app that does not need to be installed and can be pushed directly to your Outlook once enabled.
To enable the App, first make sure you have your Incoming Email set to server-side sync. To do this click Settings- Email Configuration- Mailboxes then double click the user mailbox to open it up and adjust the settings. Then under Synchronization Method, choose Server-Side Synchronization or Email Router on the dropdown. While updating these settings you may want to change Outgoing Email and Appointments, Contacts, and Tasks to Server-Side Synchronization as well. The appointments, contacts, and tasks option is powerful because you can sync outlook contacts, as well as your appointments/meetings and tasks you set up back and forth between Dynamics and Outlook, so make sure you want this and have proper security set up before completing it. You will need to Test & Enable the Mailbox once you make the change, so after clicking Test & Enable, ensure that Incoming Email Status field says Success. Also, if you run into any issues where you click Test & Enable, but nothing is happening, you may need to hit the Approve Email button. Note you must be a Global Admin on your Office 365 account for this to go through. There is a quirk within the system where if you are not a Global Admin, you can still click on the button without any error or warning. It will look like the button clicked and worked, but in reality nothing will happen if you are not a Global Admin.
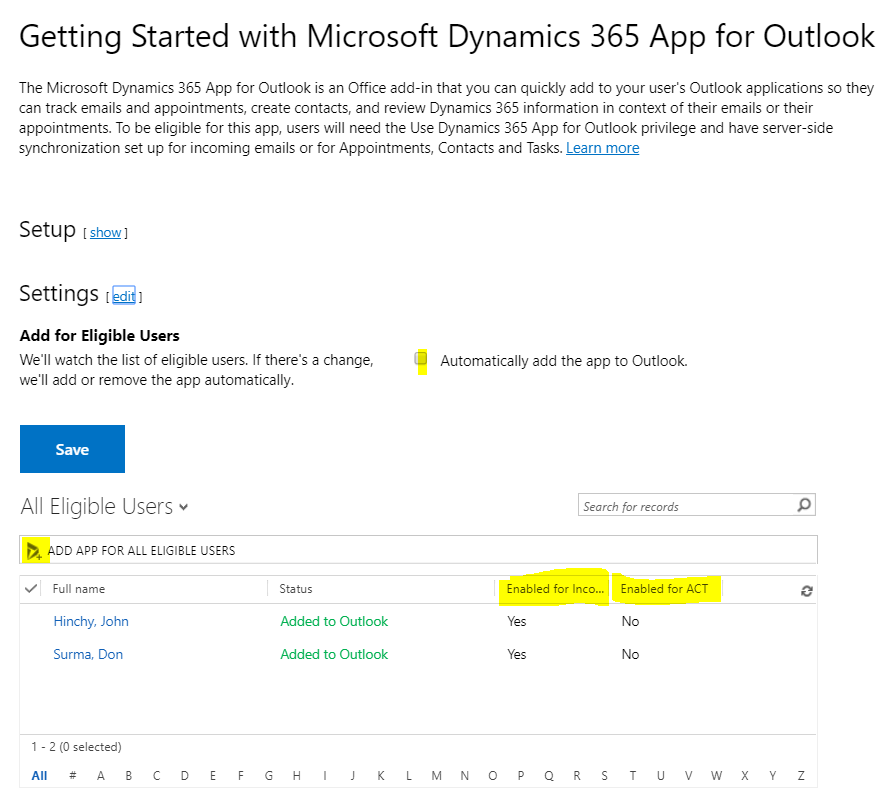
Once you show success on your Incoming Email status, navigate back to Settings- Dynamics 365 App for Outlook and click on the link. Within this screen you can choose which users to add to Outlook. Under settings there is really only 1 setting. This is a checkbox that will automatically add the user to Outlook once they have the proper setup, which is having Incoming Email enabled as server-side synchronization. In our depiction, you see a Setup feature as well. Usually you will not see this as often times man organizations will have their email in Office 365 and will use Exchange Online as their Server Profile. This is the ideal setup because it requires the least configuration and is the most reliable. You can do a Hybrid setup, but this can be complicated. If you see the user’s name you want to add the app to simply click on the ADD APP button. There will be a button to add individual users. Then, the status will turn to orange and say Pending. Once you wait about 15 minutes have the user check their Outlook, the button should appear without having to do anything, you should not even have to open or close Outlook.
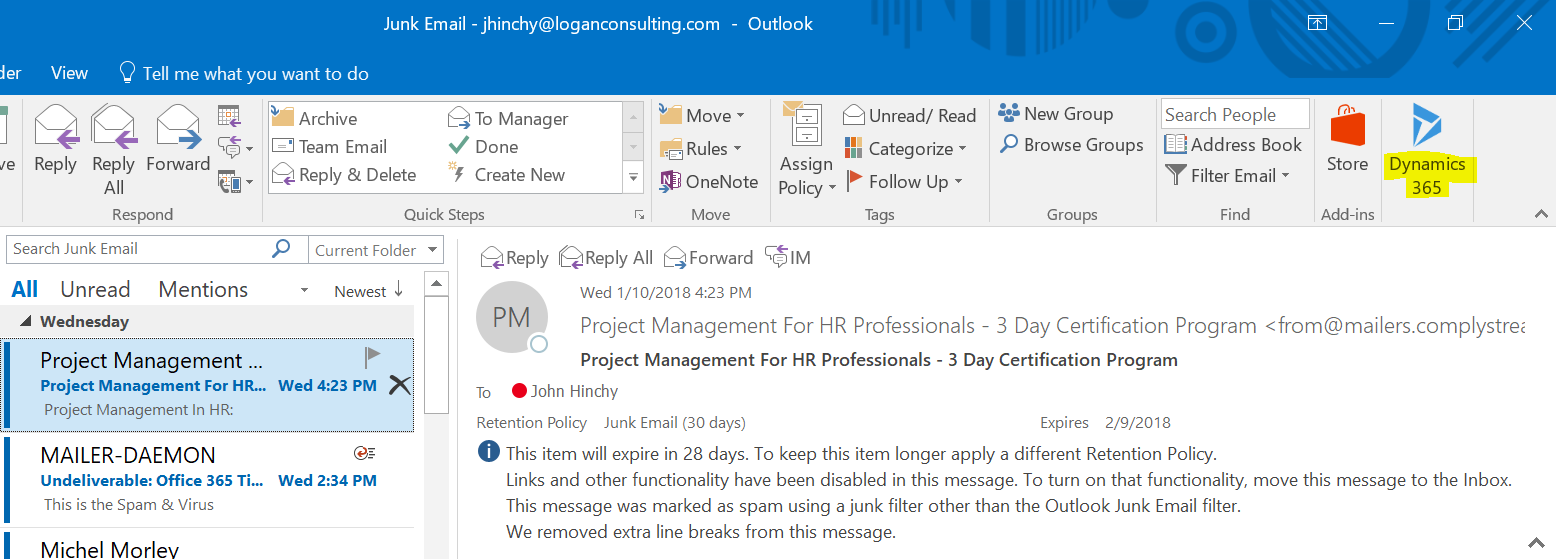
Click on the Dynamics 365 button and you are now ready to start using it. Stay tuned for next week’s blog where I will address the great new features of the App.
If you think that a CRM system is your next best step for your business, contact Logan Consulting your Microsoft Dynamics CRM partner of Chicago.


