


Reviews and corrects ledger-to-subledger alignment in D365 by fixing posting configurations, inventory profiles, reconciliation logic, GL mapping, and critical reporting procedures.
Save Time by Mapping Fields from Accounts to Opportunities in Microsoft Dynamics 365
Posted on: March 7, 2017 | By: Jim Bertler | Microsoft Dynamics CRM
Microsoft Dynamics 365 for Sales is a great tool for storing important company information and keeping all of your organization’s sales data in a safe, easy-to-access space. A major benefit though, are the tools and processes provided for using the system and completing sales. Aside from storing data, the user should make every effort to make the system work for you. The mapping of fields is often underused and overlooked, but can be great functionality for making the user experience much easier and better. Mapping fields means populating a piece of information on one entity to a field on another entity. Often times people think that you need to use a lookup field and manually “look up” the information on an entity to populate somewhere else, but with mapping you can do this automatically and without a lookup.
In this blog, I’ll use a real-life example to demonstrate how a mapping is beneficial. Many companies keep track of their customers through account numbers. You will notice that out of the box there is no field for account number. I believe Microsoft encourages the use of each account name being unique and serving as the “account number” or unique identifier. But, many organizations do use this and there is a field native to dynamics for this, the user just needs to add it to the form first. The field name is ‘accountnumber’ for reference and it is a 20-character single line of text field. Now, what if you need this number to show on other items like new opportunities. You do not want to manually have to retype this and you also want to avoid the possibility of errors in copying the correct number from the account to the opportunity. In this situation, you would want that number ‘mapped’ over from the account every time you create a new opportunity. This is fairly simple to do in just a few steps within Dynamics.
First create a new field on the entity to hold the account number. In this example we will create a new field called ‘CUSTOMER ACCOUNT #.’ You will format this field to be the same type as the field you are mapping. Thus, make the new field type single line of text as well. The length will need to be equal to or greater than the original field, so in this case it has to be at least 20 characters. Once you have saved your new field on the opportunity, open the default solution by navigating to Settings – Customizations – Customize the System.
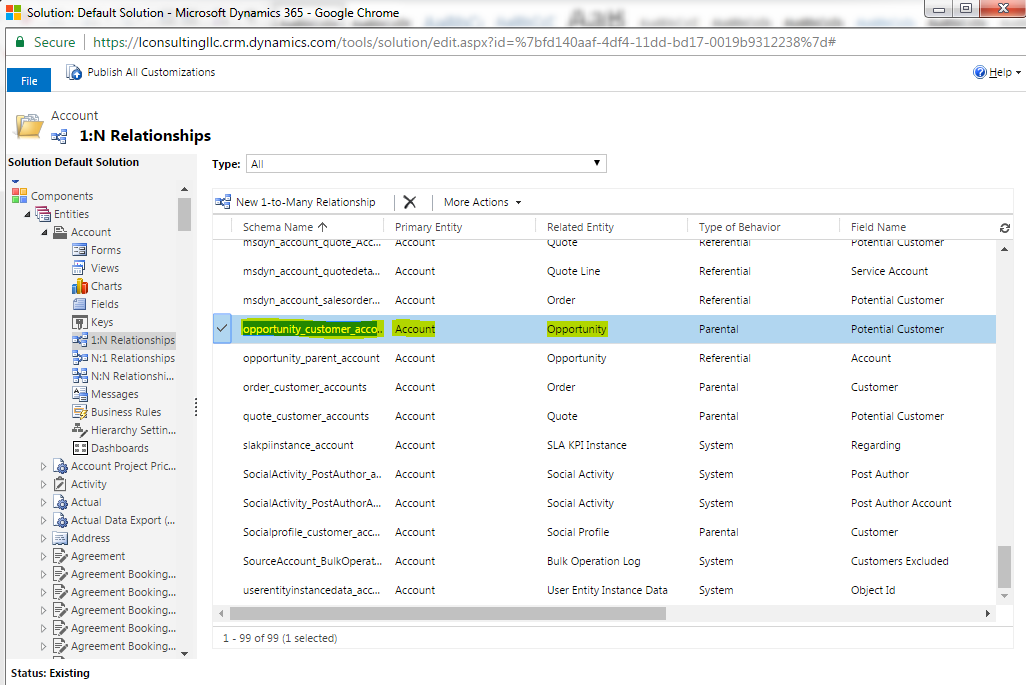
Click on the entity with your original field, in this case Account, and click on 1:N Relationships. We are choosing the 1:N so we can get to the link between accounts and opportunities because 1 account can have many (N) opportunities. Now open a relationship where the related entity is the Opportunity and it will display the existing relationships.
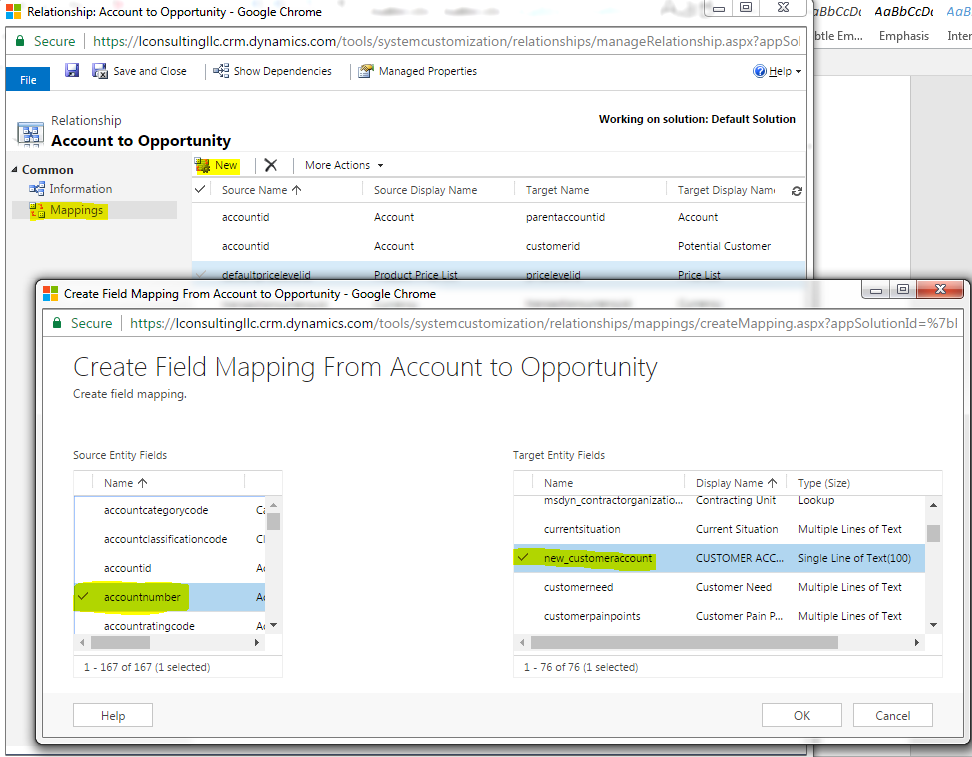
Click on ‘Mappings’ and click New to create the link between the Account Number field on Account and the Customer Account # field on Opportunity. Then choose the accountnumber field on the Source entity and the new_customeraccount field on the target entity. Click okay, publish your changes and you are finished. Now each time you create a new opportunity from an existing account your account number will transfer over. Note – you will want to make this field read-only so that no one can change this number, but also keep in mind that you have to create the opportunity from the account form. This is best practice in any Dynamics 365 for sales situation.
If you think that a CRM system is your next best step for your business, contact Logan Consulting your Microsoft Dynamics CRM partner of Chicago.


