


Reviews and corrects ledger-to-subledger alignment in D365 by fixing posting configurations, inventory profiles, reconciliation logic, GL mapping, and critical reporting procedures.
Create Automatic Job Numbers in Microsoft Dynamics 365
Posted on: March 7, 2017 | By: Jim Bertler | Microsoft Dynamics CRM
Have you ever needed to create automatic job numbers for items and records you work with in Microsoft Dynamics 365 for Sales? Well, Dynamics does provide this functionality for certain records. Those are Contracts, Cases, Articles, Quotes, Orders, Invoices, Campaigns, Categories, and Knowledge Articles. Although this Auto-Number feature works well and is helpful, many of the entities it is used for are not often utilized in many organizations. At least not in the way that Accounts, Contacts, and Opportunities are used. For these 3 main entities there is no out-of-the-box solution for adding auto-numbers. One place where this falls short especially are Opportunities. Often times a company will treat an opportunity like a job or order where an automatic Job Number is needing to created. This job number also usually needs to have some specifications like a pre-fix or a sequential numbering system that adds 1 number to the next opportunity or job that is created.
Thankfully, with CodePlex, Microsoft’s free open source project hosting site, you can now download a solution that will to create Autonumber’s on any entity. If you have CRM 2015 or greater you have the ability to use this software. In this blog, I will demonstrate how to easily install and configure this solution.
Navigate to the CodePlex website and search for CRM 2015/2016 Autonumber. Here is the link to save you some time: (https://crm2015autonumber.codeplex.com/). Download the solution on the right hand side of the page, and save it on your computer. The solution will be a .zip file called Counter_1_2_0_5_managed8.1.
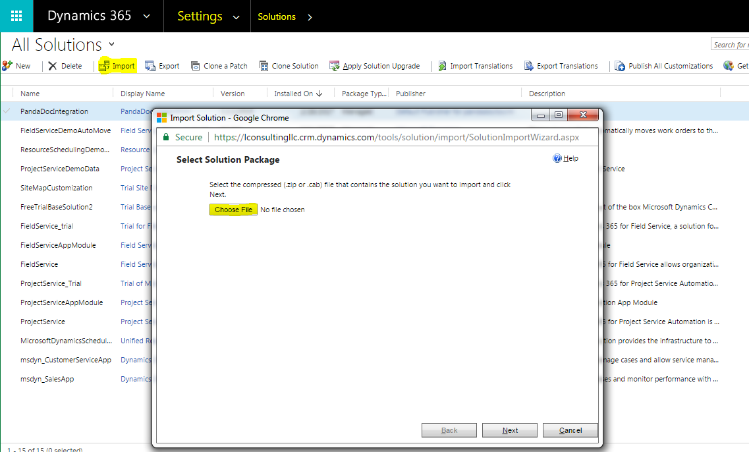
Within Dynamics 365, click on Settings – Solutions – Import. Choose the .zip file you downloaded from CodePlex and click Next. Then click Next again, and on the third screen you will click Import. Make sure ‘Enable any SDK message processing steps included in the solution’ box is checked. This should be checked by default. Your solution will begin importing and should take about a minute to complete. Once completed, click close, publish your customizations and refresh to display the new ‘Counter Configurations’ entity under Settings.
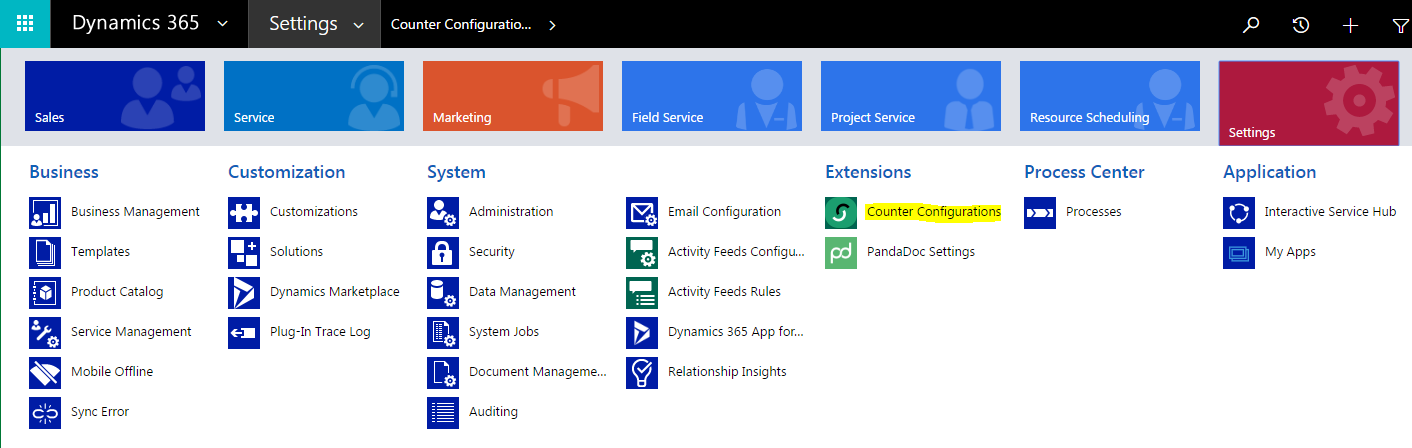
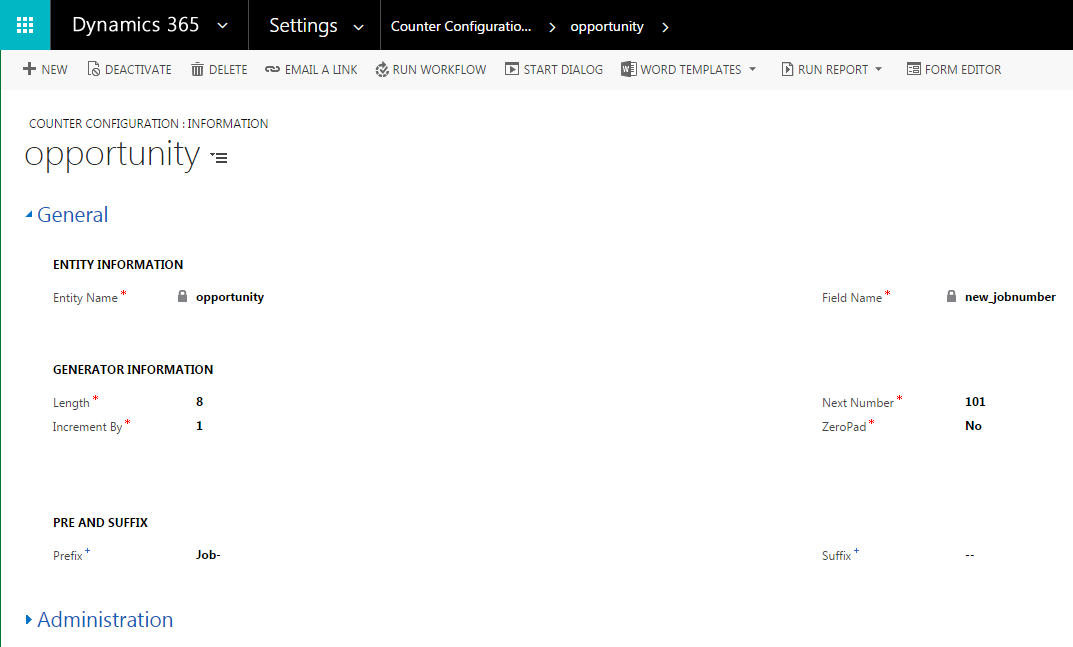
Click on the entity to open Counter Configurations view and click ‘New’ on the top left of your screen. Note* – You will need to create a field to house your Autonumber field. In this scenario I have created a field called Job Number (new_jobnumber). Now fill in the required information to configure the field. Enter the entity and the field name; here we are creating it on the opportunity, see below that you must enter the exact case and naming convention of the entity and field.
In the ‘Generator Information’ section add the field length, add a starting number denoted by the ‘Next Number’ field, add the amount to increment each number by, usually this will be 1, and for zero pad choose yes or no (if you choose yes it will automatically put zeroes to force the length to be what you chose in length, you may find it more visually appealing to click no. Then choose a prefix or a suffix to add to your Autonumber, in this scenario I have used ‘Job-‘. Then click Save&Close and your Autonumber field is complete. If anything is incompatible the way you set the field up, it will prompt you to fix it before saving.
If you think that a CRM system is your next best step for your business, contact Logan Consulting your Microsoft Dynamics CRM partner of Chicago.


