


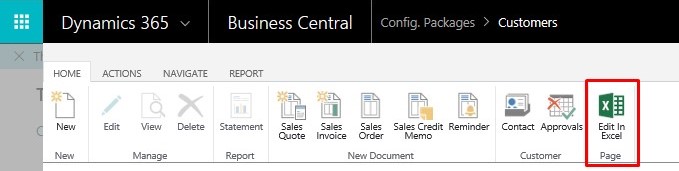
Reviews and corrects ledger-to-subledger alignment in D365 by fixing posting configurations, inventory profiles, reconciliation logic, GL mapping, and critical reporting procedures.
How to Create Stunning Data Visualizations, Reports & Graphs in Business Central
Posted on: June 26, 2020 | By: Guy Logan | Microsoft Dynamics Business Central
Yesterday, a client asked us how they could pull quarterly sales by customer, and wanted to show the data in a graph for an upcoming presentation. Business Central includes many out-of-the-box reports for viewing this type of data, but to manipulate and rearrange the information, they needed to use Microsoft Excel.
Another client wanted to add industry codes to their active customer list, but they weren’t looking forward to opening each customer record and adding that information. They, too, needed the power of Excel to make this process faster and easier.
Luckily, Business Central offers two great ways to work with your data in Excel: Open and Edit in Excel. Here are the differences between the two, and how you can start using them today.
How to Open in Excel
With this action, Excel will display the same rows and columns that appear on the page in Business Central.
You can make direct changes to these records in Excel, but the changes can’t be published back to Business Central. To save these changes, make sure to save them as an Excel file on your computer.
If Business Central is installed and runs directly on your computer, the “Open in Excel” action is available by default. However, if Business Central is set up for editing data in Excel, the “Open in Excel” action is replaced by the “Edit in Excel” action.
How to Edit in Excel
With this action, Excel will contain almost the same records and columns.
To use the “Edit in Excel” action, you need to install the Microsoft Dynamics Office add-in, which can be broken down to four simple steps.
First, open a new blank Excel workbook. Go to the “Insert” tab, and click “My Add-ins”.
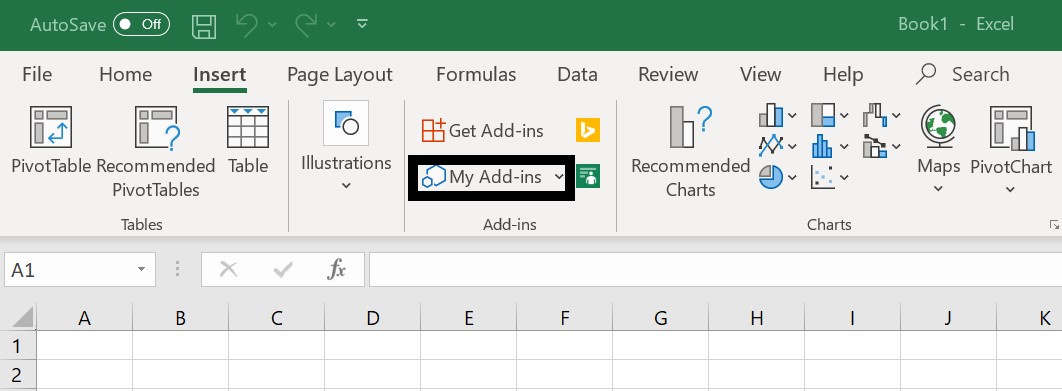
Then, check if the Microsoft Dynamics Office add-ins is already included in the “My Add-ins” tab. If it hasn’t been added, find it in the Microsoft store and click “Add”. After it’s been added, click the “Add server information” option.

The benefit of using the “Edit in Excel” action is that it lets you make changes to records in Excel and publish the changes back to Business Central to save them. However, this only works on Windows, not macOS.
When the Excel file opens, enter your Microsoft Office 365 sign-in credentials. Then, you should be able to add new records, modify existing records, and delete records. Now, you’re ready to use the “Edit in Excel” action in Business Central.
Viewing and Analyzing Data from Business Central
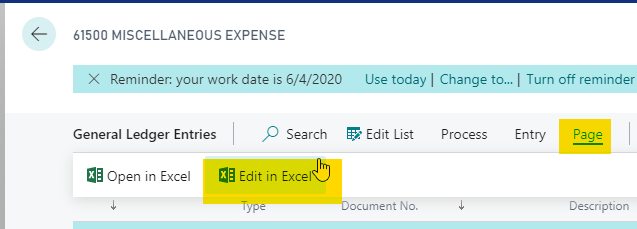
In addition to inserting, modifying, and deleting records, a user can also view and analyze data from Business Central in Excel. An example of this would be to open General Ledger Entries in Excel and create pivot tables to analyze certain accounts.
To do this, first navigate to General Ledger Entries and click “Edit in Excel” under the “Page” tab. Click “Enable Editing” and sign-in to the Microsoft Dynamics Office Add-In that pops up on the right.
Once the data loads, create a pivot table by clicking on “PivotTable” under the “Insert” tab.

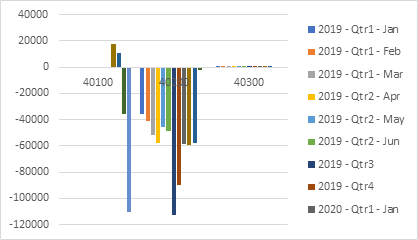
From there, you can slice and dice the data in any way you want. To analyze sales by quarter, put the accounts in the rows, the posting date in the columns, and sum the amount column. Filter out the sales accounts, and you’ll be able to see sales by quarter.
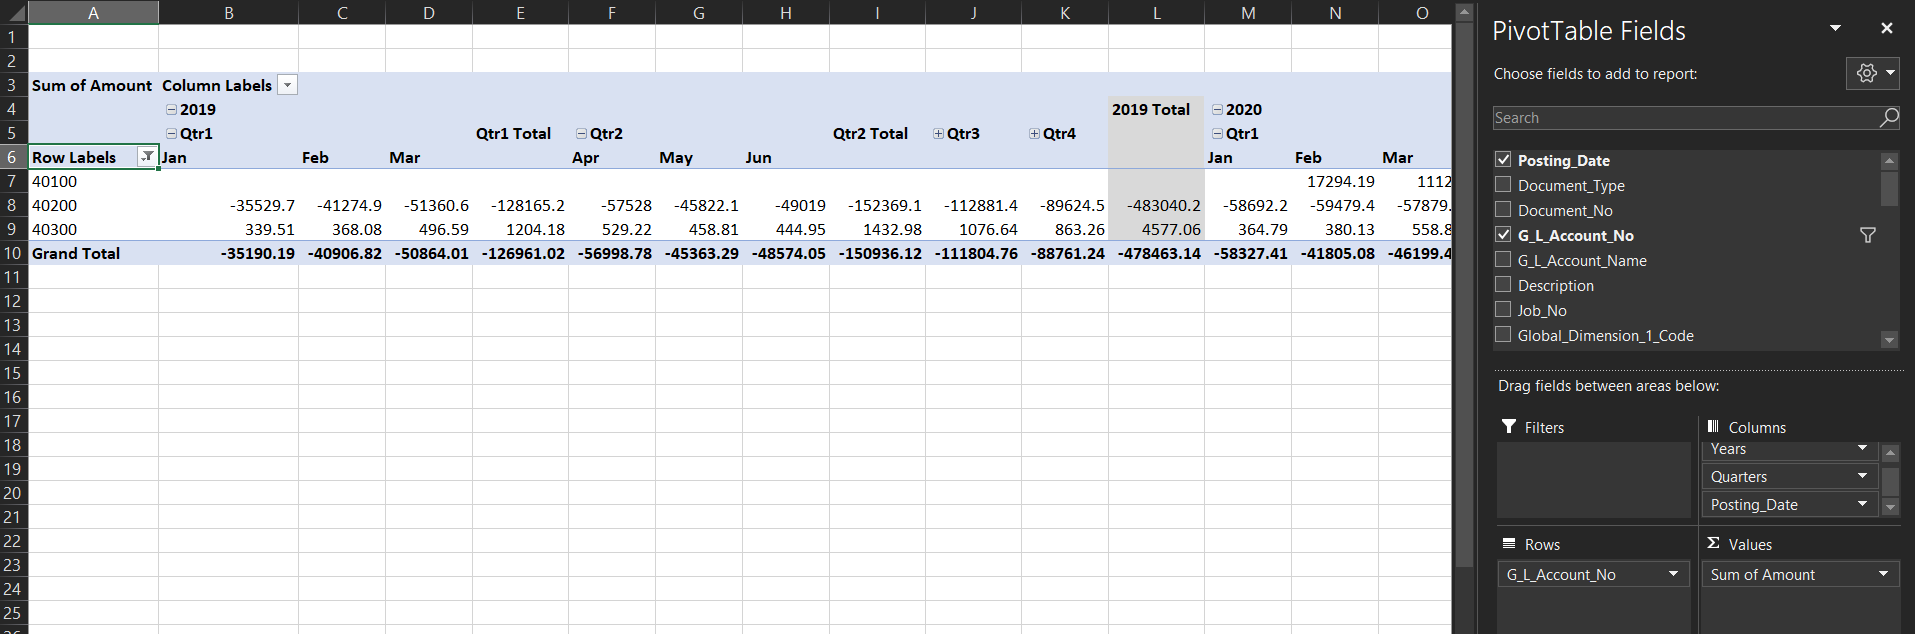
A bar graph of your sales by quarter will appear, and you’ll be ready to start analyzing your data in Business Central.
Conclusion
Need help setting up Business Central with innovative tools like Excel? Logan Consulting, based in Chicago, is committed to making technology easier for clients across the nation. Talk to us about any of your Business Central needs.
IMPORTANT NOTE: With the release of the Business Central 2020 Wave 1 update, permission to “Edit in Excel” is now managed as a permission set. After the upgrade, most users will not be able to utilize the “Edit in Excel” feature by default. To grant access to this function, make sure to assign the D365 Excel Export Action permission set to “Users” or “User Groups”.


