As undesirable as it may be, it is common for a company to have a need to write off a bad account receivable after the specific account is found to be uncollectible from a customer. Why do businesses decide to write off bad debt? Writing off bad debt serves the purpose of improving the company’s accuracy in accounting; it does not remove the customer’s obligation to pay. It brings visibility to the bad customer debts a company may currently have. The decision to write off a bad debt may also be taken when it becomes clear for whatever reason that the customer is not going to pay, such as when the customer goes out of business, comes under serious legal attack from other creditors, or simply challenges the legitimacy of the obligation. An entry to write off the bad debt will consist of two steps: 1) a credit to Accounts Receivable in order to remove the amount that will not be collected, and 2) a debit to Bad Debts Expense to report the amount of the loss on the company’s income statement. Dynamics 365 makes this process incredibly easy for the accounts receivable department and the staff accountants involved in writing off this process. In Dynamics 365, writing off bad debt is as simple as finding the customer and amount, or invoice that needs to be written off, pressing a write-off button, and then posting a system-generated journal entry. This task guide will show you how to set up the parameters for write-offs and then write off transactions from the Collections page, the Open customer invoices page, and the Customer page.
Set up the Write Off Parameters
- Go to Navigation pane > Modules > Credit and collections > Setup > Accounts receivable parameters.
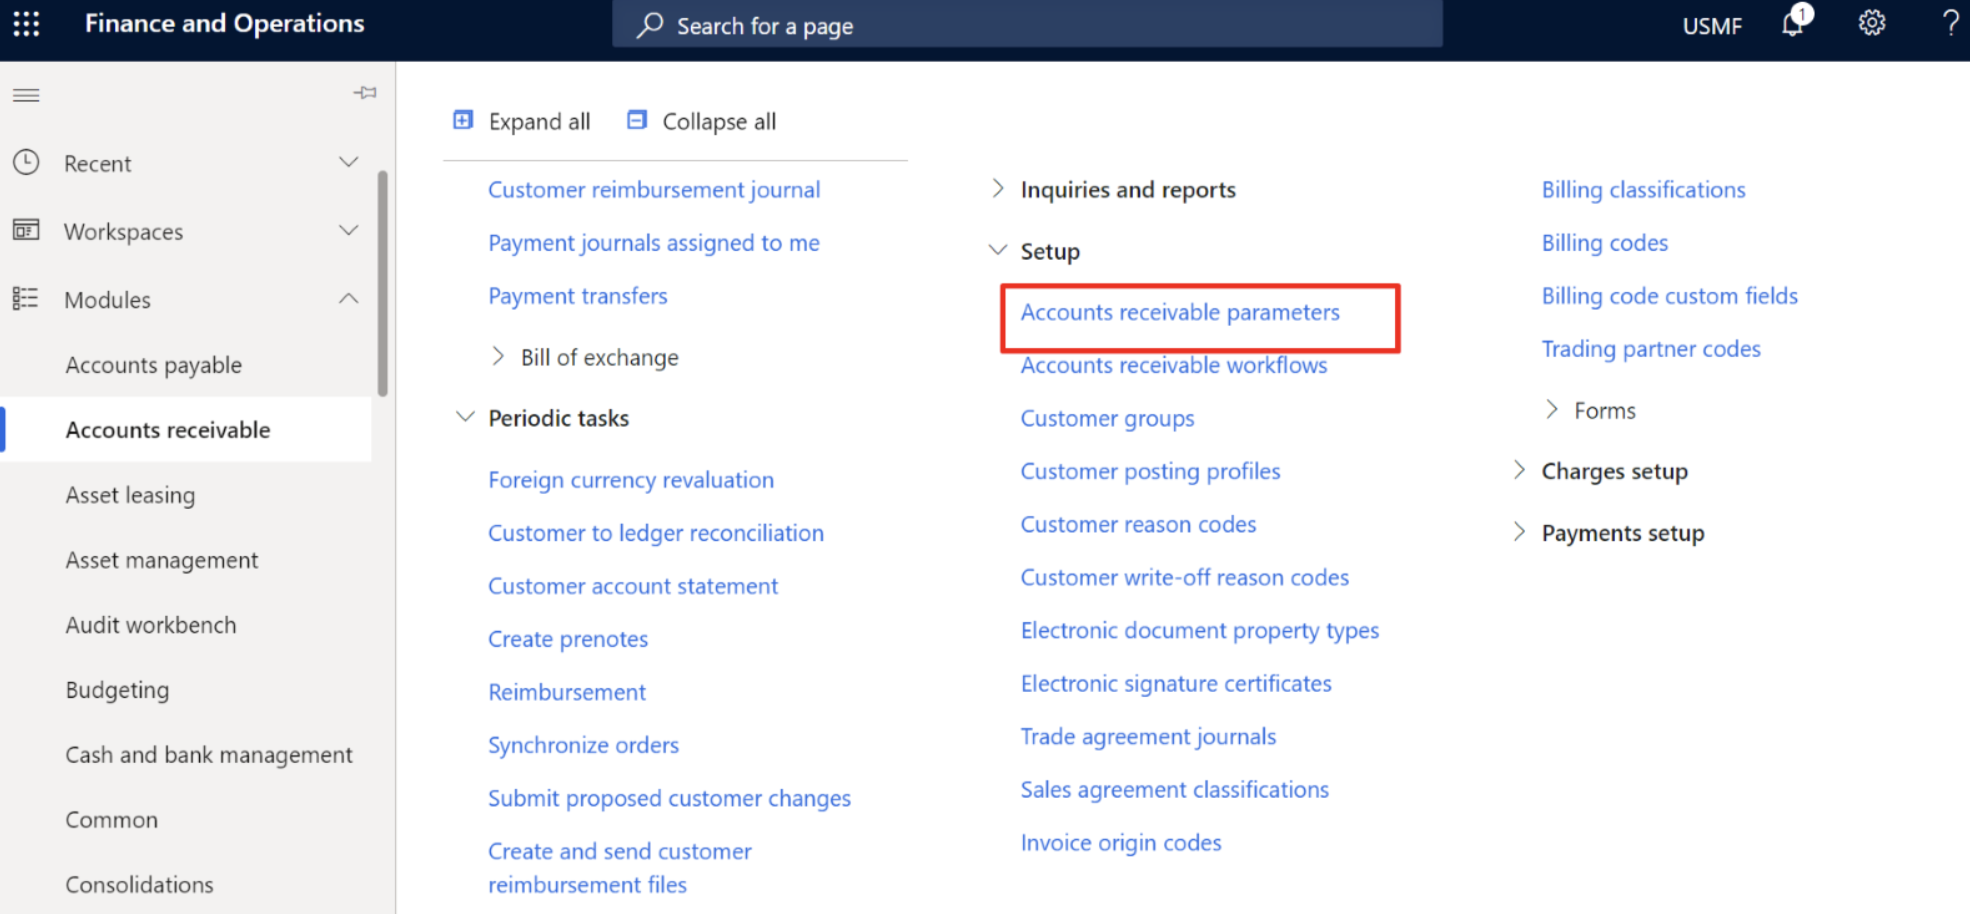
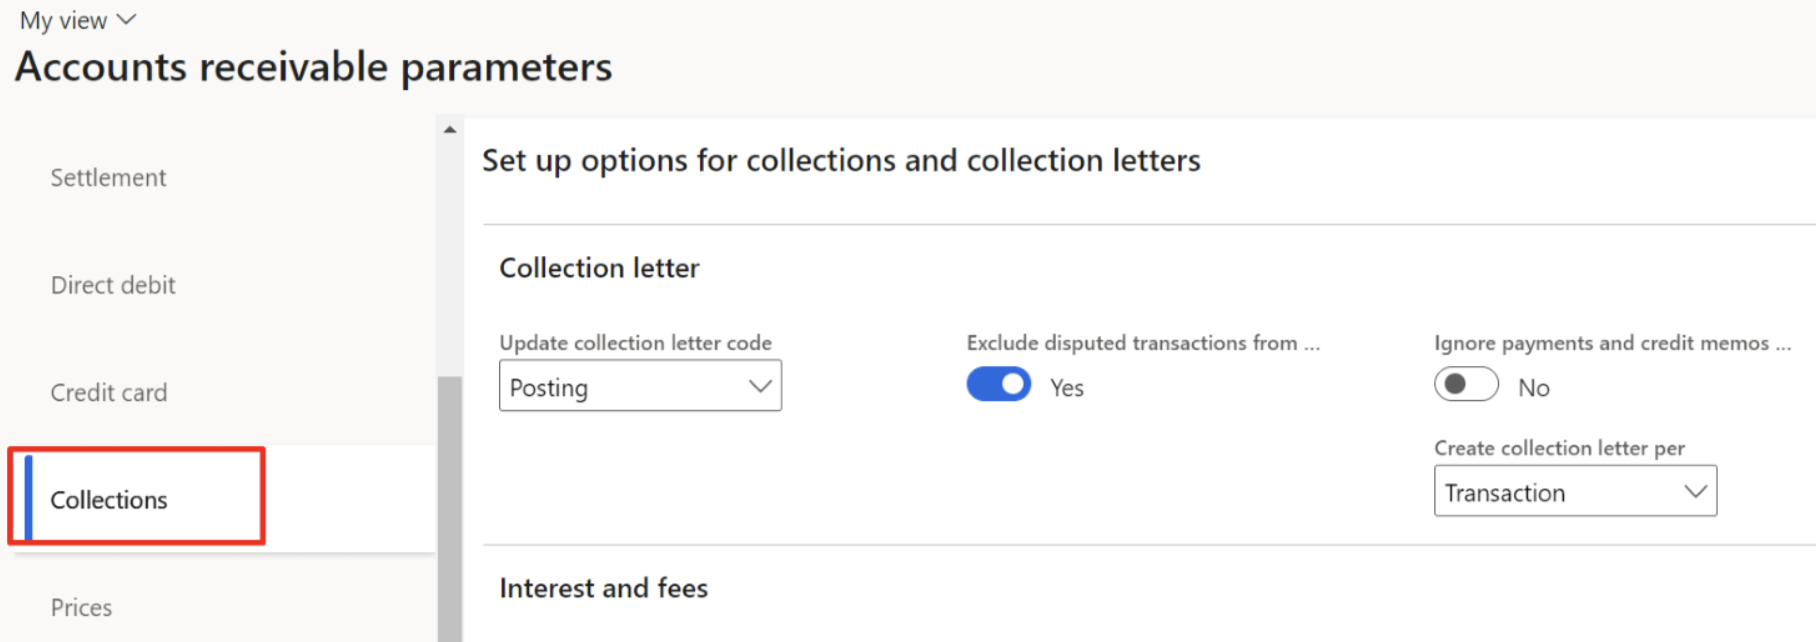
- Click the Collections tab.
- Expand or collapse the Write-off section.
- The Write-off journal is the general journal that will hold the write-off transactions that you create.
- You can attach a reason code to every write-off. You can override this default at the time of the write-off.
- Set the Separate sales tax to Yes if you want to separate the sales tax from the original transaction in the write-off.
- Close the page.
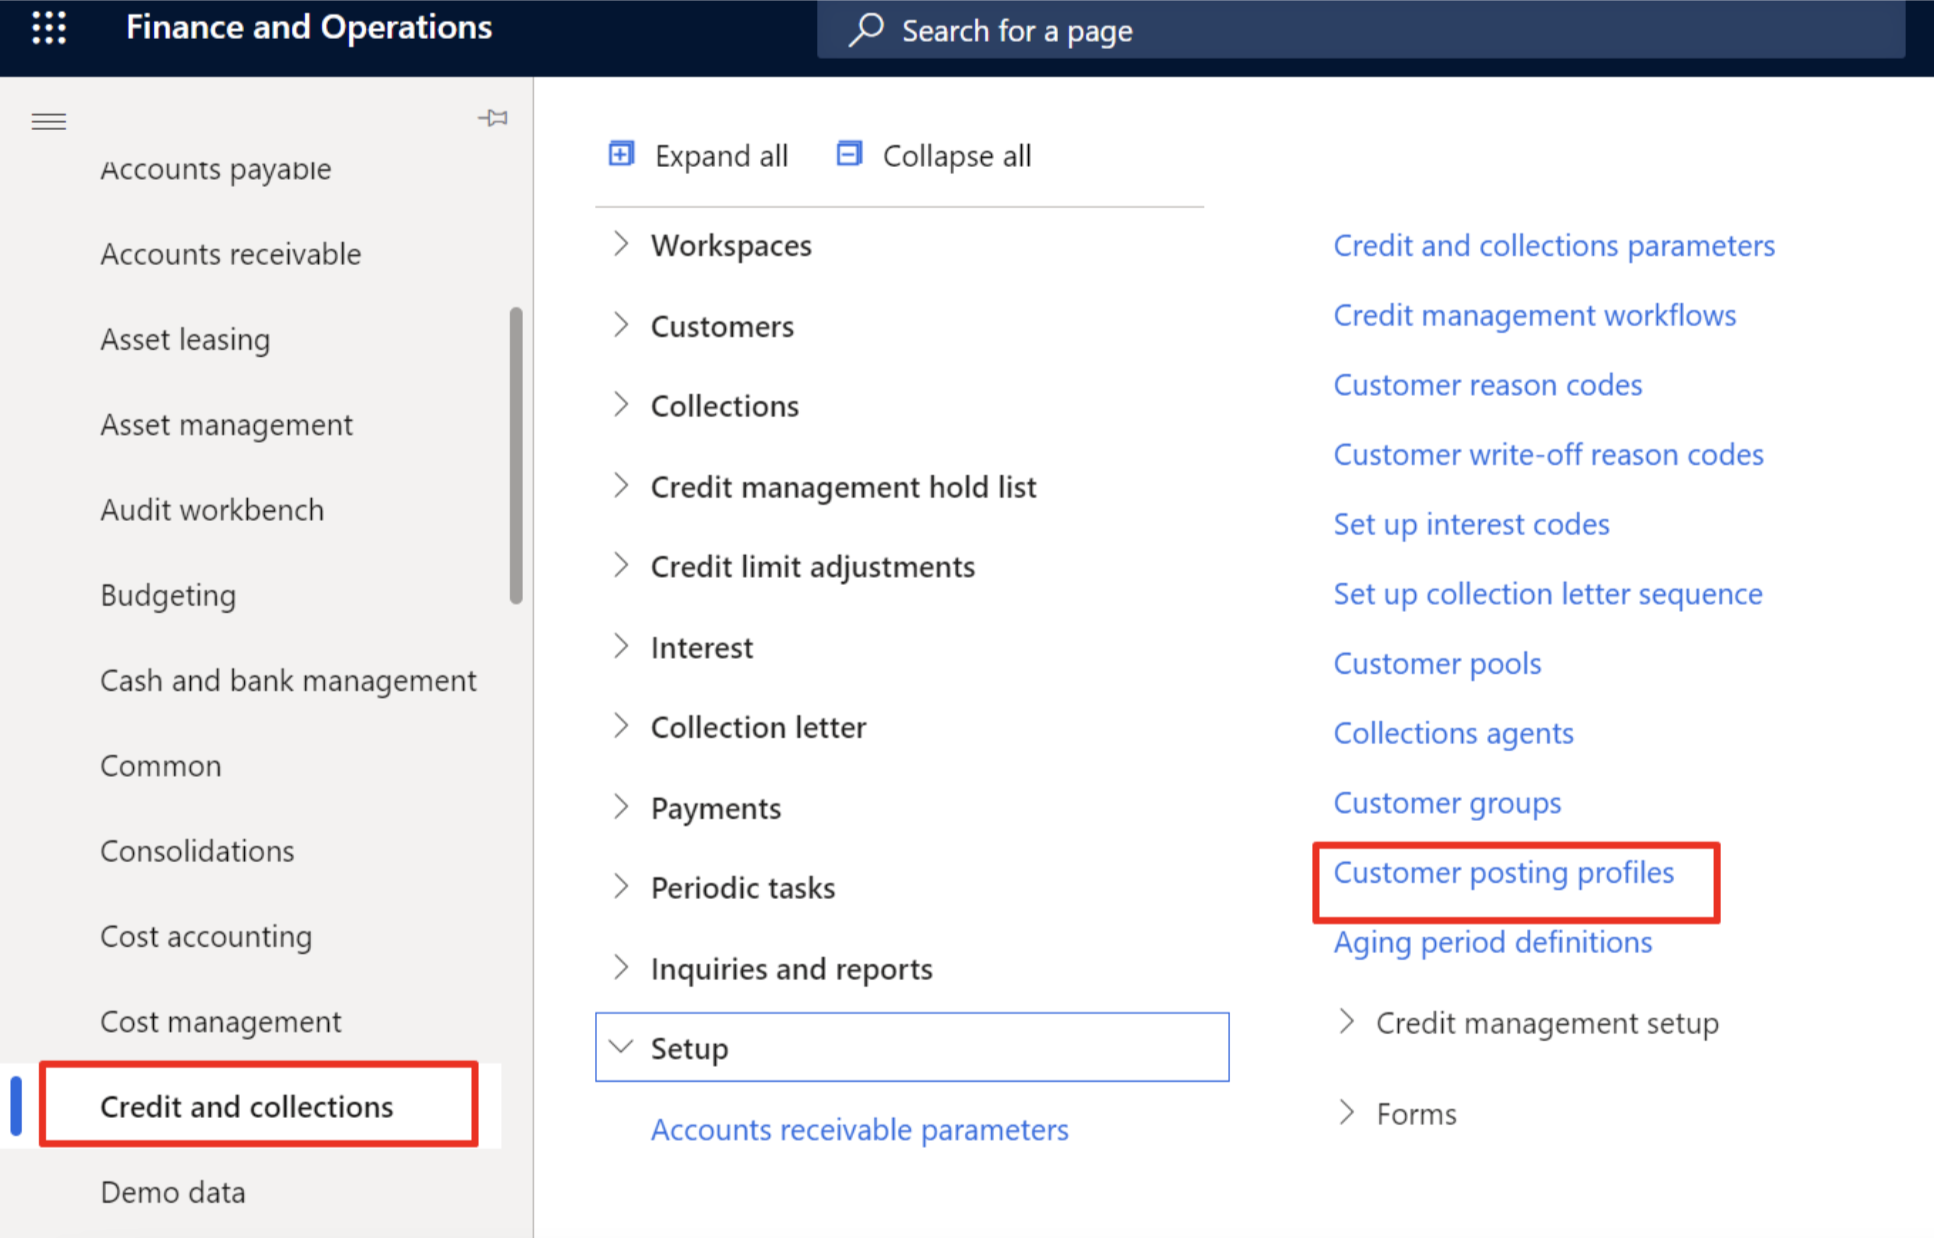
- Go to Credit and collections > Setup > Customer posting profiles. The write-off account will be used as the expense account or reserve adjustment in the general journal.
- Close the page.
Write Off a Customer Balance from the Aged Balances Page
- Go to Credit and collections > Collections > Aged balances.

- Mark the row for the customer that you want to write off.
- On the Action Pane, click Collect.
- Click Write off.

- Click OK.
- Close the page.
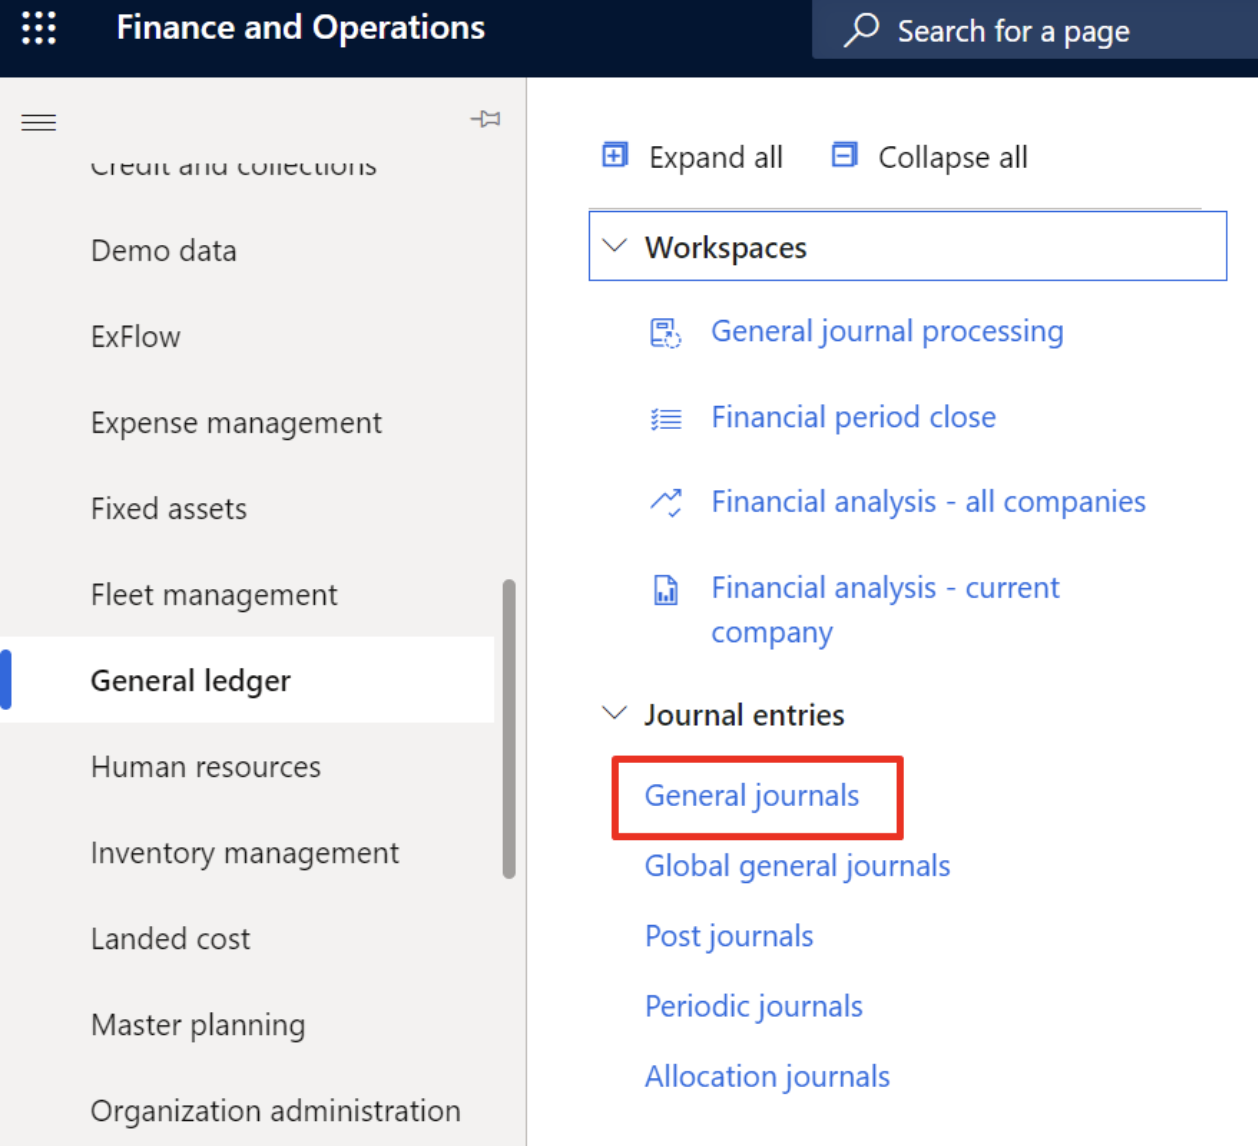
- Go to Navigation pane > Modules > General ledger > Journal entries > General journals.
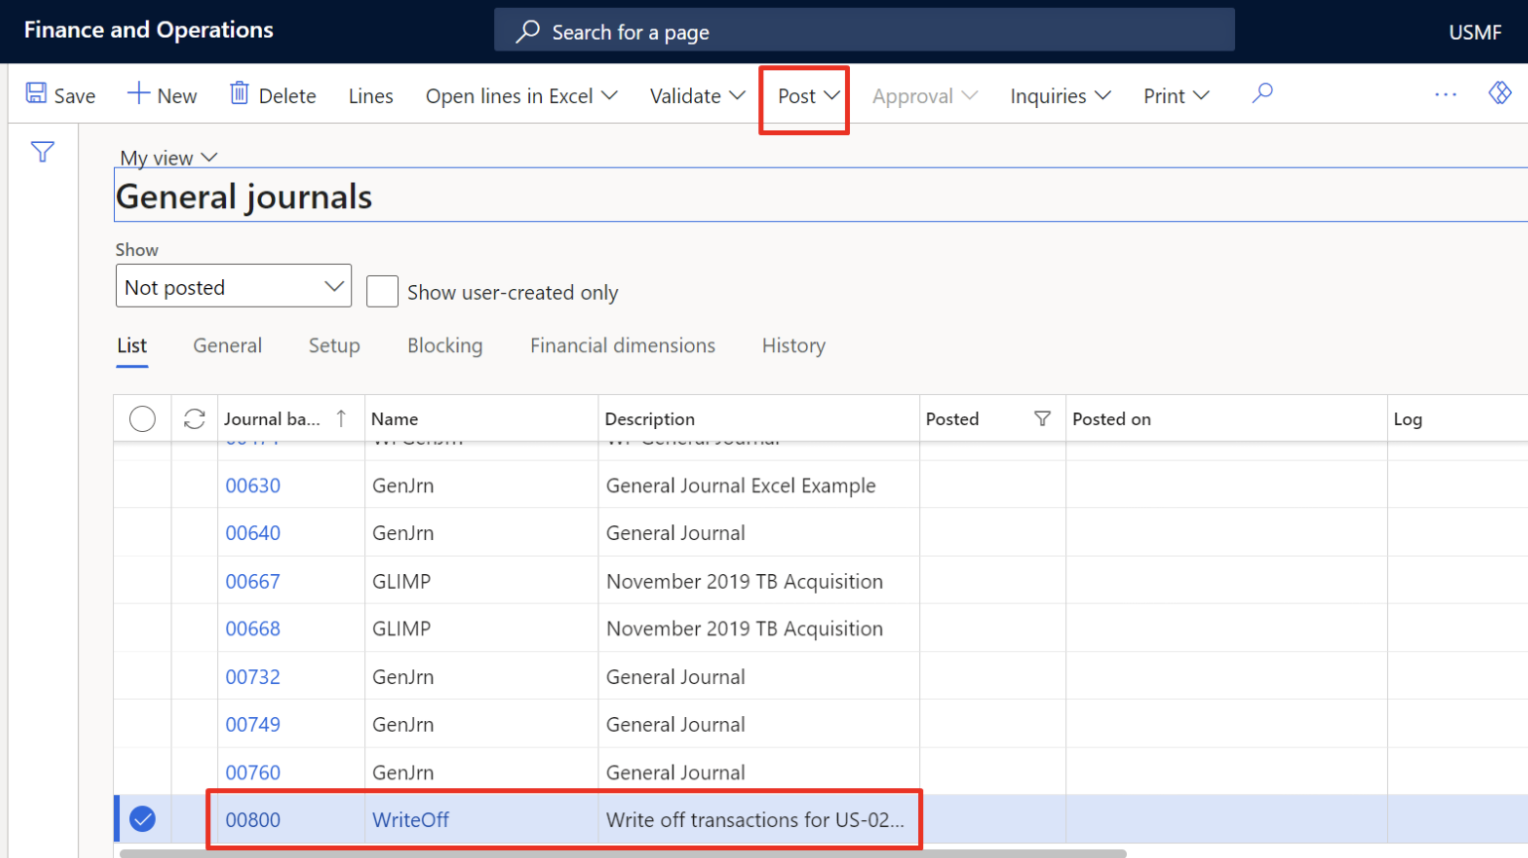
- Select the journal batch number for the journal that contains your write-off. One line is created to reverse the customer balance. One or more lines are created to post the write-off to the write-off account.
- Close the page.
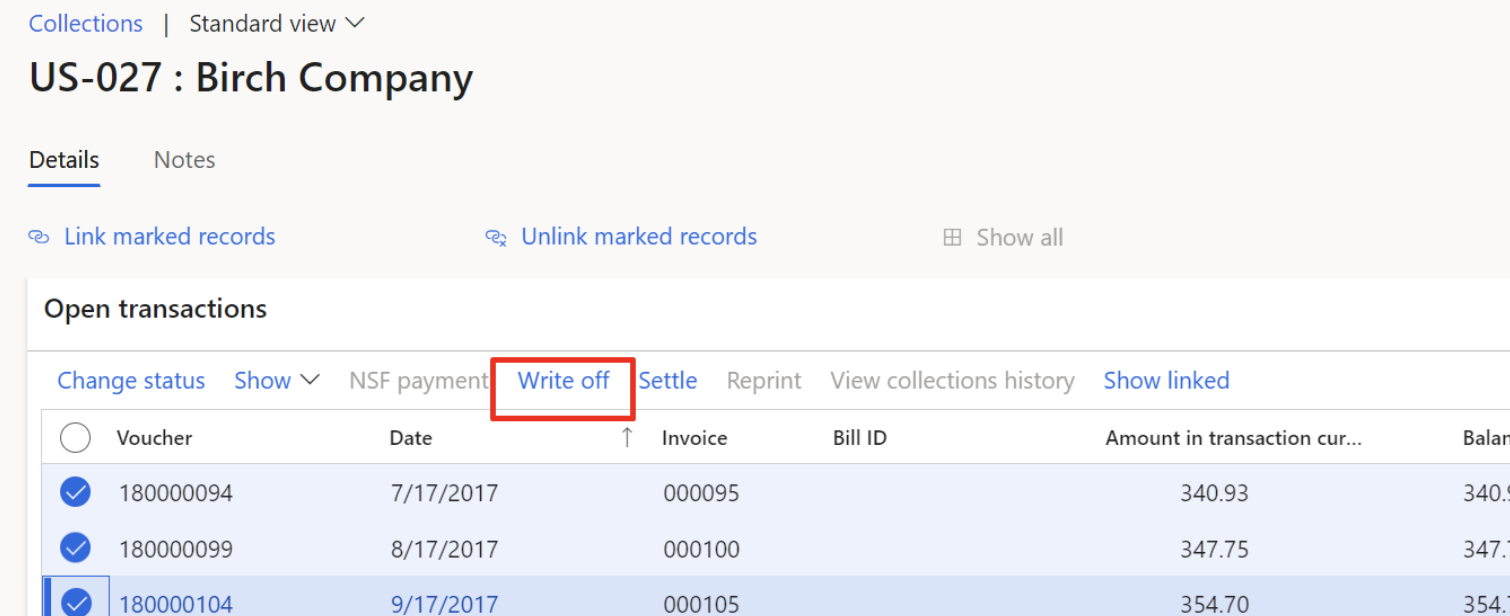
Write Off Transactions from the Collections Form
- Go to Credit and collections > Collections > Aged balances.
- Select the name of the customer that has the transactions that you want to write off.

- Mark the row for the first transaction.
- Mark the row for the second transaction.
- Click Write off.
- In the Reason comment field, type ‘Bad debts’.
- Click OK.
- Close the page.
- Go to General ledger > Journal entries > General journals.
- Select the journal batch number for the journal that contains your write-off. One line is created to reverse the customer balance. One or more lines are created to post the write-off to the write-off account.
- Close the page.
Write Off an Invoice from the Open Customers Invoices Page
- Go to Navigation pane > Modules > Accounts receivable > Invoices > Open customer invoices.
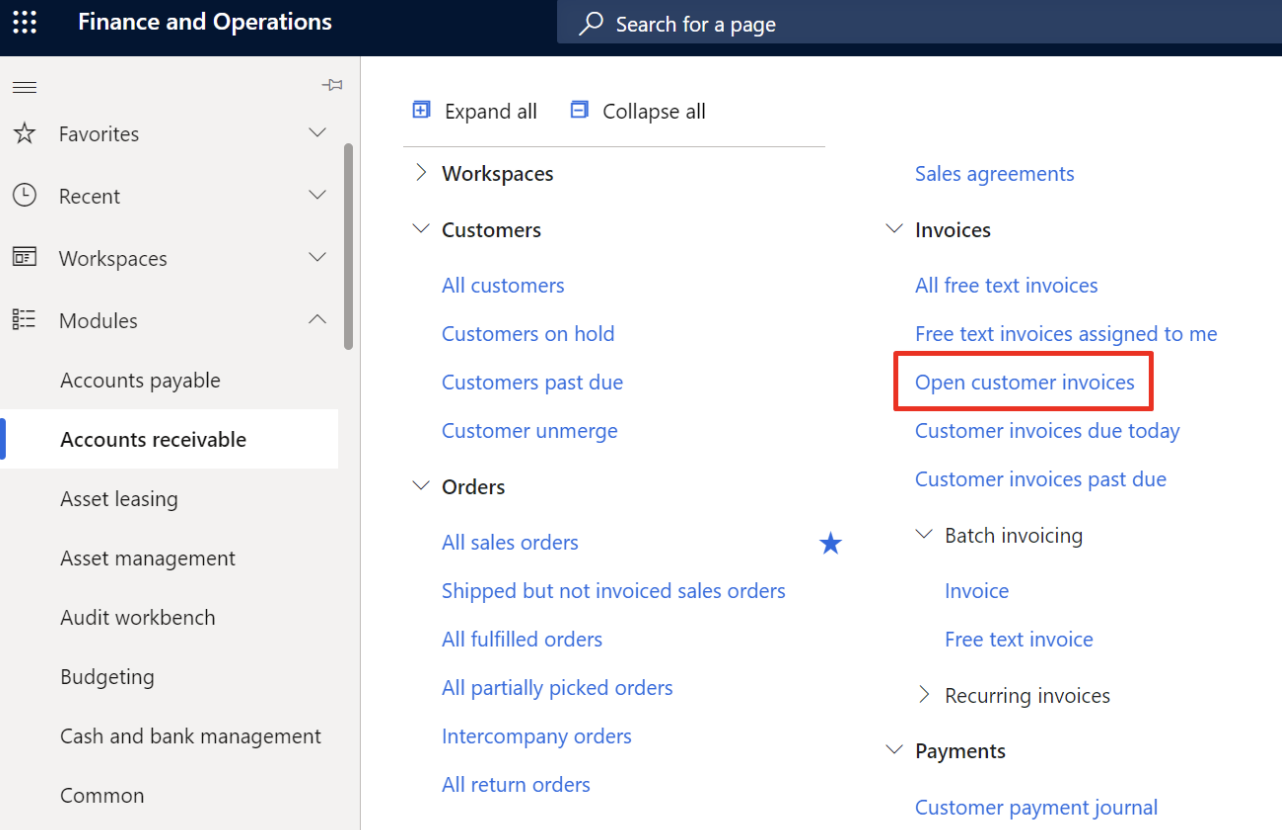
- Mark the line for an invoice.
- On the Action Pane, click Invoice.
- Click Write off.
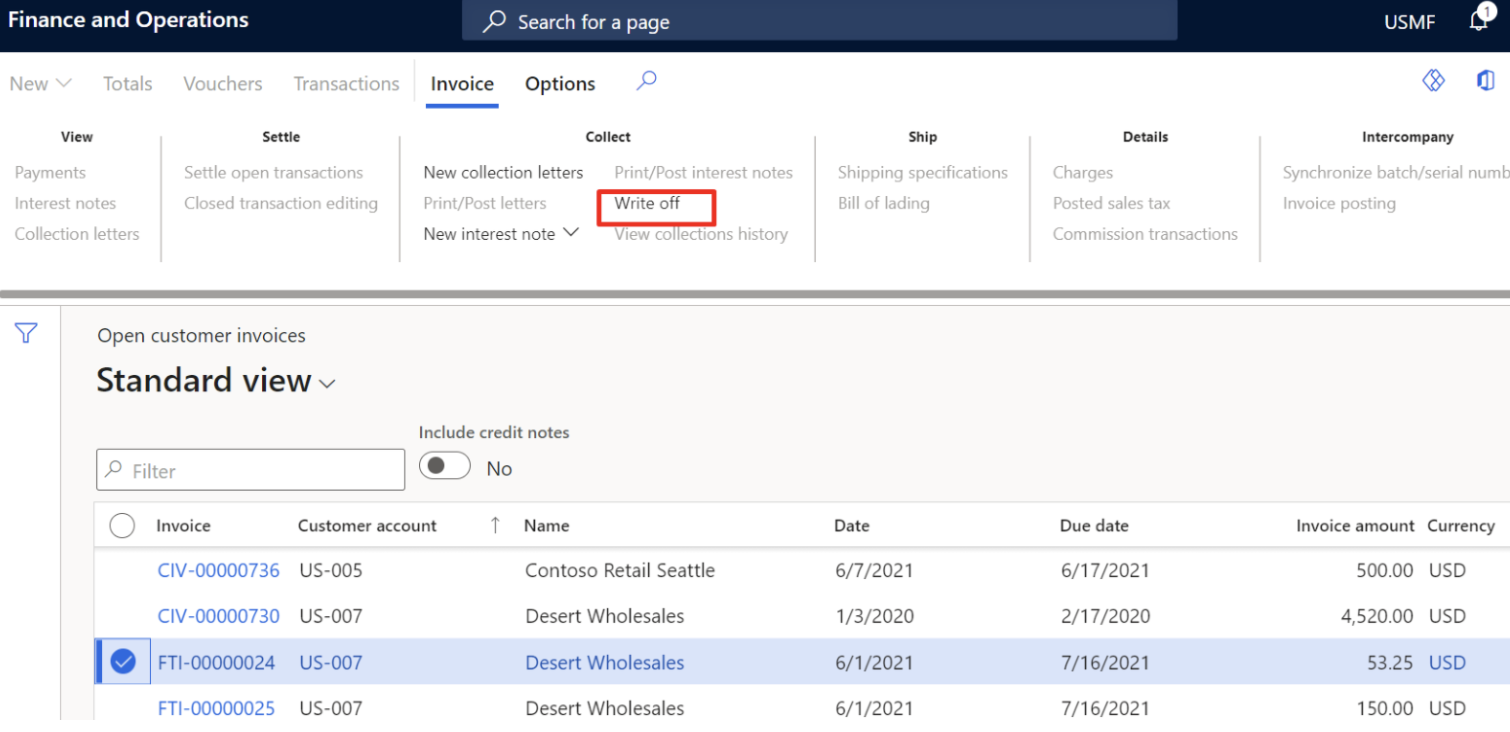
- Click OK.
- Close the page.
Write off a Customer Balance from the Customer Page
- Go to Accounts receivable > Customers > All customers.
- Select a customer account.
- On the Action Pane, click Collect.
- Click Write off.
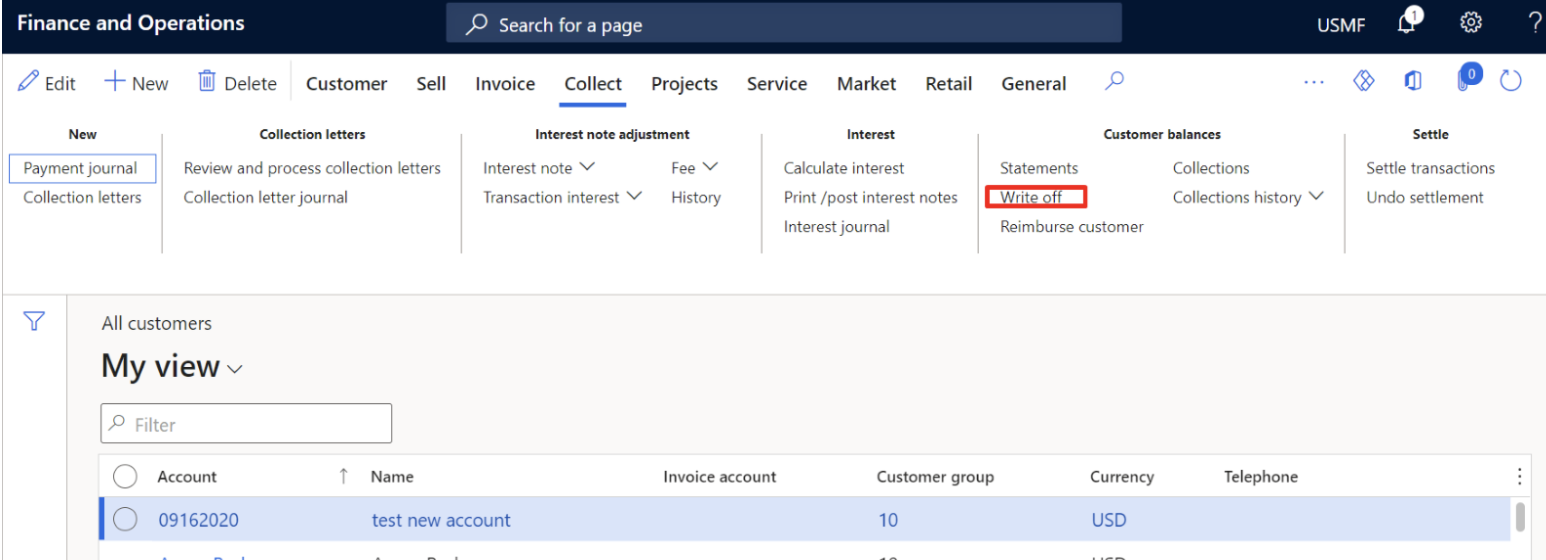
- Click OK.
- Close the page.
Next Steps
If you are interested in learning more about easily writing off bad debt as well as maximizing the use of Microsoft Dynamics 365 for Finance and Supply Chain Management contact us here to find out how we can help you grow your business. You can also email us at info@loganconsulting.com or call (312) 345-8817.