When setting up your collections module in your Dynamics 365 Finance environment, it is important to ensure that your collections team has access to work with their assigned customers. In this topic, we will explain how to review collections information as well as various setup options and collections transactions. This way, the Collections team does not get overwhelmed with information and can efficiently filter to their specifically assigned customers.
Collections Team
In order to set up Collections agents, you must first create a Team for your Collections agents. You can set up your Teams by navigating to Organization administration > Organizations > Teams. Here, you can define Teams of either type Collections or Employees. You can also assign a Team administrator and define whether or not the Team is active.
 |
Next, you must assign the Collections Team within Credit and collections parameters. If you begin creating Collections agents without first creating a Collections team, a default Collections team will be created and assigned in Credit and collections parameters.
 |
Create Collections Agents
- In the navigation pane, go to Credit and collections > Setup > Collections agents.
-
- Use this page to set up workers as collections agents and optionally assign customer pools to them. A collections agent is a person who works with customers to make sure that payments are collected in a timely manner.
- Collections agents that are set up on this page are automatically added to a collections team. If a team is selected in the Team field in the Accounts receivable parameters page, collections agents are added to that team. If a team is not selected, a new team named Collections is created automatically and the collections agents are added to that team.
- Select the desired agent, then select Add in the page.
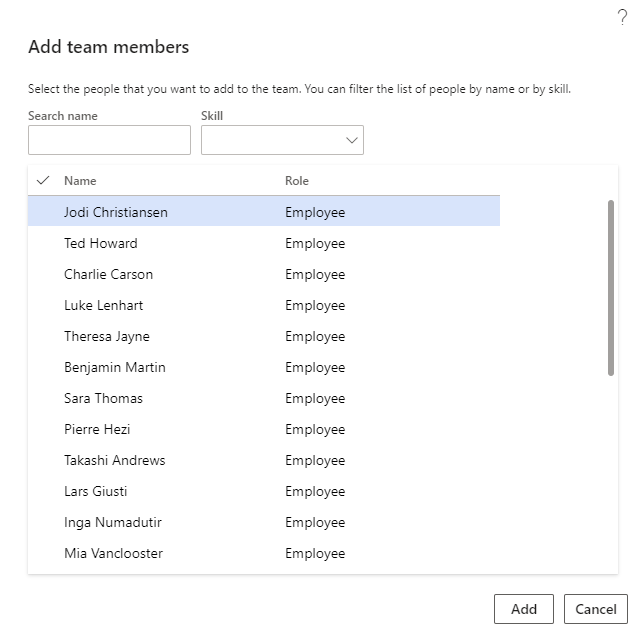
- In the Pool ID field, select the desired record in the drop-down menu.

- Select or clear the Default pool check box.
-
- Select this option to include all customer pools in filter lists for the selected collections agent. If this option is not selected, only the customer pools that are assigned to the collections agent are available in filter lists.
Create Customer Pools
Customer pools are used to break Customers down into definable groupings that can then be assigned to Collections agents. Customer pools are a strong tool to aid your Collections department in the division of responsibilities and can be created using a large number of Customer related fields in the system.
- In the navigation pane, go to Credit and collections > Setup > Customer pools.
-
- Use this page to set up customer pools, which are queries that define a group of customer accounts that can be displayed and managed for collections or aging processes. Use customer pools to filter information on the Collections list page and on related list pages. You can also use customer pools to filter the customer accounts that are included when aging snapshots are created.
- You can use customer pools to filter the customer accounts that are included when aging snapshots are created.

- Select New.
- In the Pool ID field, type a value.
- In the Pool description field, type a value.
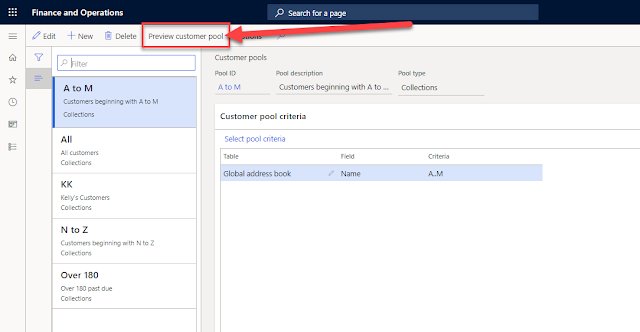
- Click Select pool criteria.
- In the Criteria field, type a value.
- Select OK.
- Select Preview customer pool.
Collections Process Automation
Organizations spend significant time researching aged balance reports, customer accounts, and open invoices to learn which customers should be contacted about an open invoice or account balance. This research takes time away from a collection agent’s time that could otherwise be spent communicating with customers to collect past due balances or resolving invoice disputes. Collections process automation lets you set up a strategy-based approach to your collection process. This helps you apply collection activities consistently by providing customized email reminders, or programmed processes for sending collection letters. You can use the Collections process setup page (Credit and collections > Setup > Collections process setup) to create an automated collections process that will schedule activities, send email messages, and create and post customer collection letters. The process steps are based on the leading or oldest open invoice. Each step uses this invoice to determine what communication or activity should take place with a specific customer.
Next Steps
If you are interested in learning more about reviewing collections information as well as maximizing the use of Microsoft Dynamics 365 for Finance and Supply Chain Management contact us here to find out how we can help you grow your business. You can also email us at info@loganconsulting.com or call (312) 345-8817.


