


Reviews and corrects ledger-to-subledger alignment in D365 by fixing posting configurations, inventory profiles, reconciliation logic, GL mapping, and critical reporting procedures.
Voiding Checks & Payments in Business Central
Posted on: January 3, 2022 | By: Kevin Gallagher | Microsoft Dynamics Business Central
Have you been forced to reverse a payment of void a check issued from Business Central? The process itself is tricky and somewhat confusing, but hopefully this guide will help you understand the process better.
To understand how to void a check and reverse a payment, we must first understand the postings involved in these transactions. The most difficult part of the payment reversal process is knowing exactly what needs to be reversed and how to do so.
Understanding Ledgers and Postings
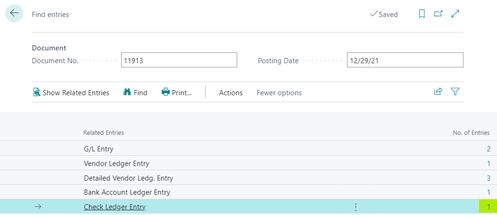
Let’s start by taking a look at the journal entries and ledgers involved when a vendor payment is posted. View postings by navigating to the vendor payment in question and selecting Entry>Find entries.

Ledgers:
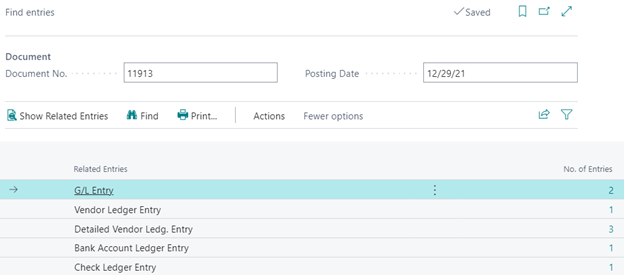
- General Ledger – As with most transactions in Business Central, a general ledger posting is created.
- Vendor Ledger – Our vendor ledger records the transaction details including the vendor, amount, dimensions, etc.
- Detailed Vendor Ledger – The detail vendor ledger contains 3 postings, 1 for the payment itself, and 2 others detailing the application of the payment.
- Bank Account Ledger – All vendor payments made will have a Bank account entry. This posting reduces the balance shown in our bank account.
- Check Ledger – This payment was a check, therefore a check ledger entry was created when the payment was posted.
Journal Entry:

- The entry Debits the Accounts Payable account associated with the vendor and Credits the GL account tied to the bank account we paid from
Process the Payment Void/Reversal:
Now that we understand all postings involved, where do we start to reverse this payment and check?
Where we start depends on the type of payment:
- Computer Check – Navigate to the Check Ledger Entry
- All other payments – Navigate to the Vendor Ledger Entry
Reverse a Check Payment
- From the Check Ledger Entry screen or the Find entries transaction detail shown below, find the check to be reversed.
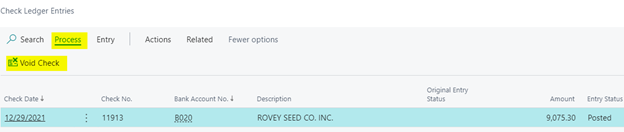
- Next, click on Process>Void Check to begin the reversal process.
- Business Central will prompt you for the Void Date, which will default to the payment date, as well as the type of void.
- Unapply and void check – This action will reverse the application of this payment to invoice(s). Payments applied to invoices cannot be reversed, so you should choose this option unless the payment has already been unapplied.
- Void check only – Use this option only if the payment has been unapplied or was never applied to an invoice.

- The Details section will show the bank account, check number, vendor number and amount to be voided. Confirm these details before clicking Yes to process the void.
- ***Note: If the payment has already been reconciled in a bank account reconciliation, the payment cannot be reversed.***

- In the Check Ledger, the Entry Status is updated to Financially Voided.
- Click on Entry>Find entries to view all reversed transactions that occurred when the payment was voided.
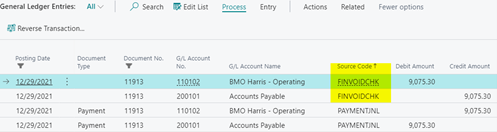
- In each journal, the No. of Entries has increased to offset the entries created when the payment was posted.
- GL – There is now an additional journal entry with a Source Code of FINVOIDCHK. This entry Debits our bank account and credits Accounts Payable.
- The net impact of the journal entries displayed is $0, as we hoped for.
- Vendor Ledger Entries – An entry with a Source Code of FINVOIDCHK has been registered, reversing the vendor ledger entry for the payment.

- Detailed Vendor Ledger Entries – An additional entry was added to reverse the payment, again with a Source Code of FINVOIDCHK.

- Bank Account Ledger Entry – A reversing entry referring the check number is posted, offsetting the credit to our bank account balance. The bank account balance impact is now net $0.

- Check Ledger Entry – As show above, the status of the check is updated to Financially voided. This reverses the amount in the check ledger, so there is no need for an offsetting entry.

Reversing all Other Forms of Payment
- Navigate to the payment in the Vendor Ledger.
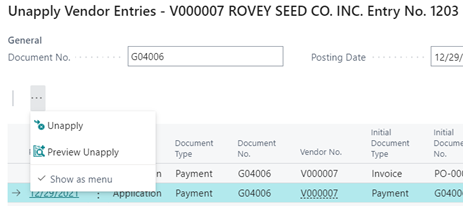
- Unapply the payment by clicking Process>Unapply Entries. Only unapplied payments can be reversed.
- Click …>Unapply and select Yes to the prompt to unapply the payment.
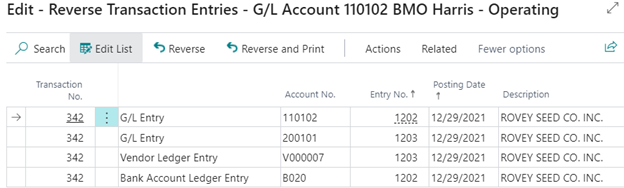
- Now that the payment has been unapplied, we can begin the reversal by clicking Process>Reverse Transaction.
- Business Central will provide a preview of entries to be reversed.
- Confirm all postings displayed should be reversed. Click Reverse to process these transactions, or Reverse and Print to also print a summary of the reversal.
- The system will ask to confirm your selection, select Yes.
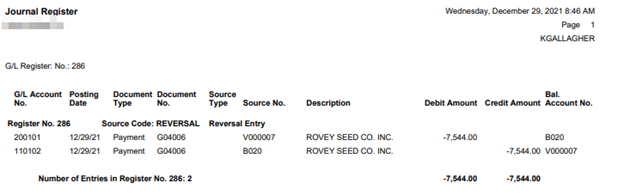
- If successful, a GL register will print with the details of the GL entry reversal.
- All reversed postings can be viewed from Entry>Find entries.
I hope this blog has taught you how to successfully reverse payments and void checks in Business Central. Read more informative blogs on Logan Consulting’s website!


