


Reviews and corrects ledger-to-subledger alignment in D365 by fixing posting configurations, inventory profiles, reconciliation logic, GL mapping, and critical reporting procedures.
Monthly Inventory Close in Microsoft Dynamics 365…Am I Doing It Right?
Posted on: April 21, 2021 | By: Jarrod Kraemer | Microsoft Dynamics AX/365, Microsoft Dynamics Manufacturing
If you’ve ever asked yourself this question you are not alone. Although D365 offers some great tools in helping you close out inventory every month many people do not even know they are there. Inventory closing is necessary for your business to calculate the correct cost prices of inventory, so it is critical to make sure we run inventory close correctly to ensure accurate results. In this post, we are going to go through the steps associated with completing a successful inventory close.
Steps to perform a monthly inventory close:
1. Navigate to Inventory and Warehouse management > Periodic > Closing and Adjustment
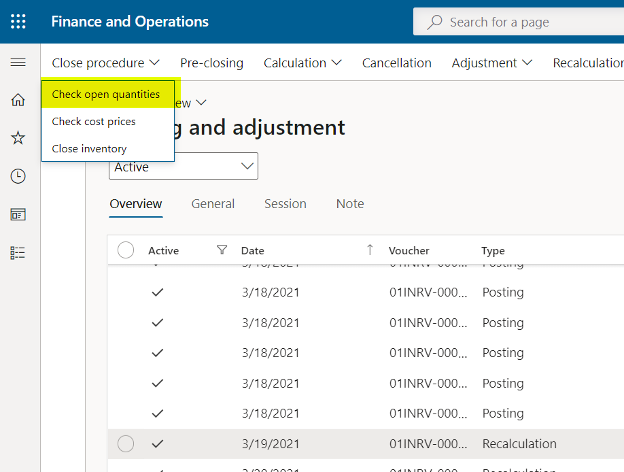
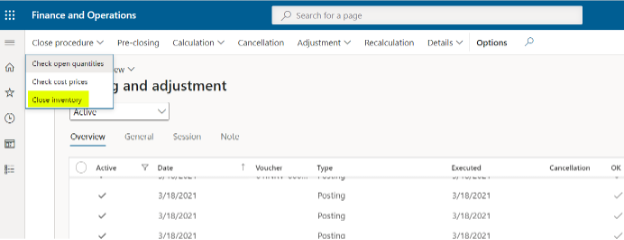
2. In the upper left-hand corner click on the ‘Close Procedure’ button. And perform steps 3-5.
3. Click ‘1. Check open quantities’:
- In the ‘Expected closing date’ field, choose the last day of the month you will be closing inventory for, and click ‘OK’.
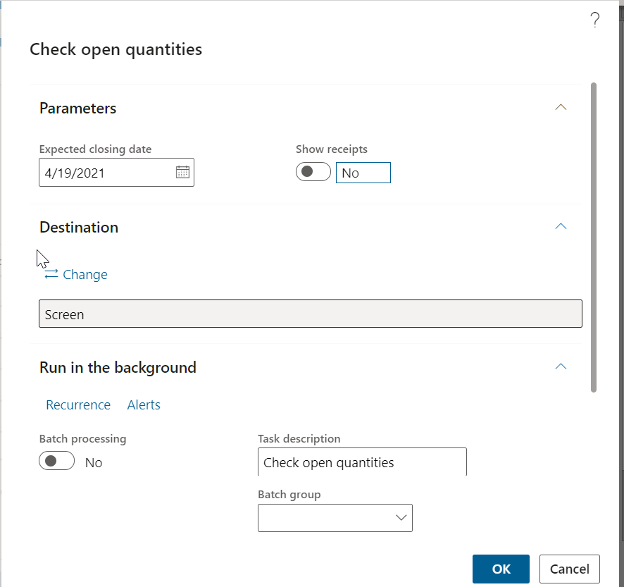
- This will print a report of all of the open quantities that will not be fully settled by the inventory close on the specified date. These are items that were physically updated but not financially updated items before the inventory close date.
- Before running inventory close distribute this list to the appropriate people to financially update anything that can be ended. This entails ending any open production orders, invoice any shipped or received sales or purchase orders.
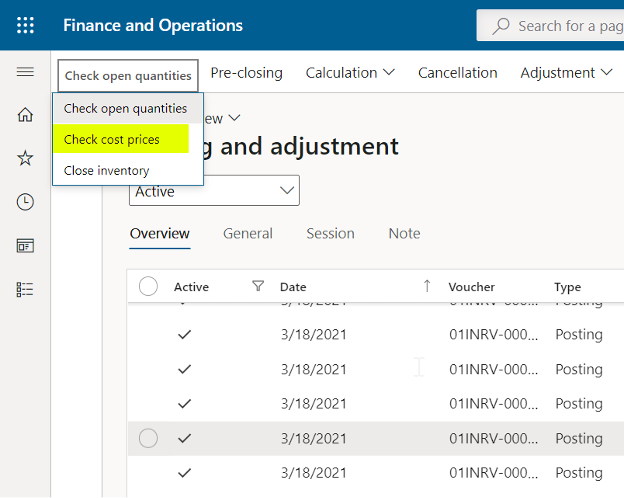
4. Click ‘2. Check Cost Prices’:
- In the ‘Expected closing date’ field, choose the last day of the month you will be closing inventory for.
- Choose a deviation percentage – this is what you choose to be acceptable for the deviation from the item’s cost price on any given transaction.
- Choose a specific item group to look at if you want to look at this report one group at a time.
- Click OK
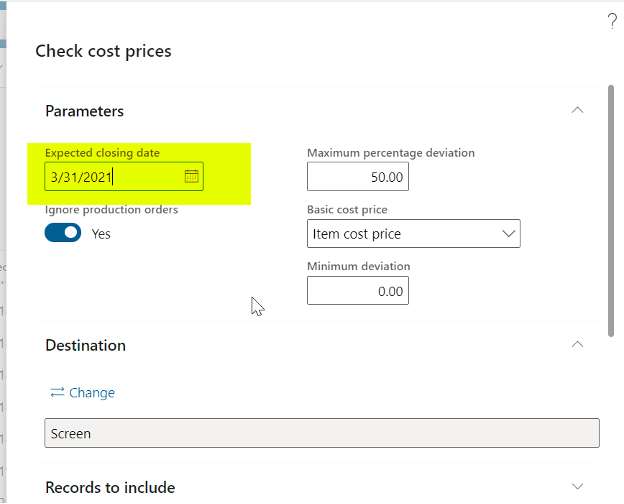
· The report printed will give a list with dates of transactions that deviate from the cost price.
· Once the report is printed look at transactions for all items on the report – this will help you identify any costs entered in error
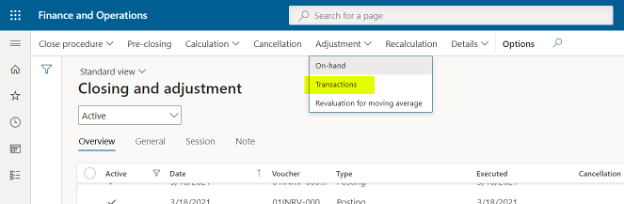
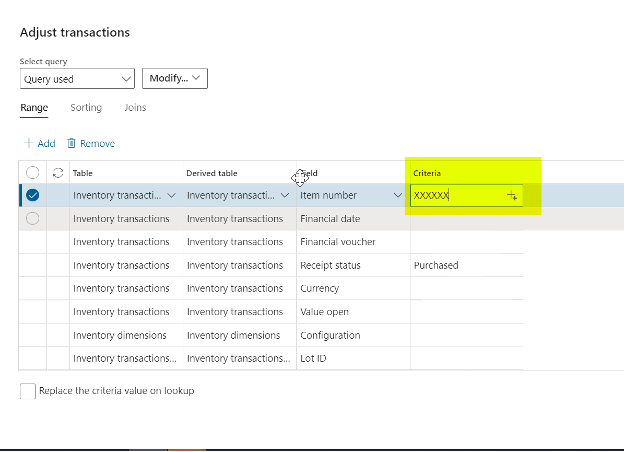
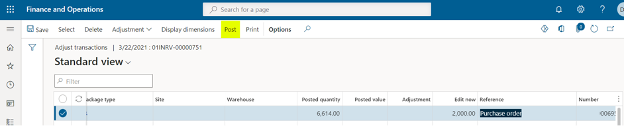
5. Click Adjustment to adjust any cost prices for items that were incorrectly entered into the system. You can filter by item number, transaction date, voucher number, batch number, etc.
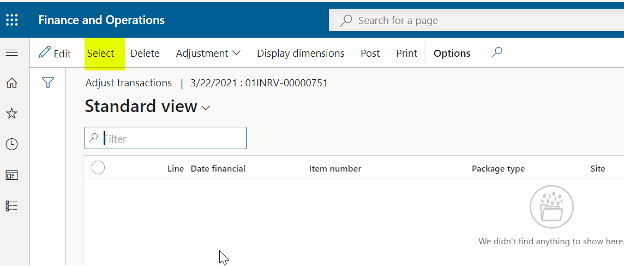
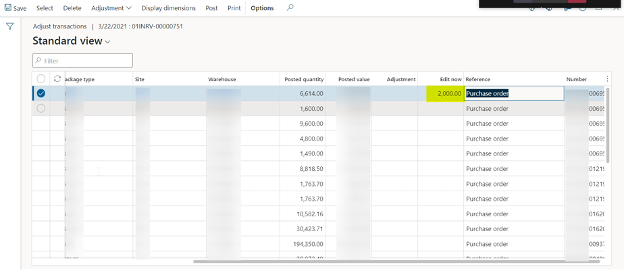
Once the screen populates with transactions you are able to adjust the transaction cost amount. Enter the amount you want to increase or decrease the transaction amount by in the edit now field. Click post, and make sure to change the posting date to the date of the original transaction.
Now we are ready to close inventory!
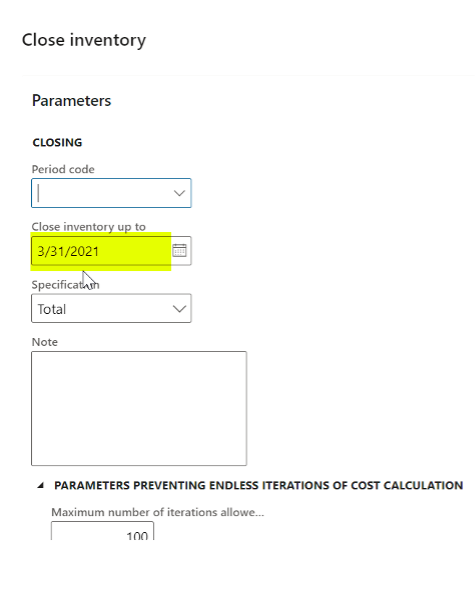
6. Click ‘3. Close’, in ‘Close inventory up to’ field enter the last day of the month you will be closing inventory for, and click ‘OK’ to close inventory for the month.
7. Be patient while inventory close runs for the month.
8. When close is completed Navigate to Inventory and Warehouse management > Periodic > Closing and Adjustment, highlight the inventory close that you just completed, and click on settlements to view all the adjustments that were made for the month. You can also view the voucher from this form. Once you have completed the inventory close procedures you are ready to perform monthly analysis on inventory cost amounts. Hopefully, this cleared up any questions regarding whether or not you are performing your inventory close correctly.
Next Steps
If you are interested in learning more about monthly inventory closing as well as maximizing the use of Microsoft Dynamics 365 for Finance and Supply Chain Management contact us here to find out how we can help you grow your business. You can also email us at info@loganconsulting.com or call (312) 345-8817.


