


Reviews and corrects ledger-to-subledger alignment in D365 by fixing posting configurations, inventory profiles, reconciliation logic, GL mapping, and critical reporting procedures.
How to Use Power Automate with Calculated or Roll-Up Fields
Posted on: July 27, 2020 | By: Guy Logan | Microsoft Dynamics CRM
Several years back, Microsoft first introduced calculated and roll-up fields in Microsoft Dynamics CRM. Over the last few years, they’ve provided great functionality to the system and have been constantly used in our client projects. However, one of the key limitations we’ve discovered is that you cannot trigger workflows or reference them in a workflow or business rule.
There’s no doubt that the development of plug-ins or JavaScript codes have found workarounds for this problem. However, custom plug-ins can be costly to develop and maintain, and JavaScript may not be as useful because it cannot continuously run in the background of your system.
That’s when Power Automate Flows can step in to help. But how does it work in Microsoft Dynamics CRM? Let’s consider the following scenario to see what it looks like in action:
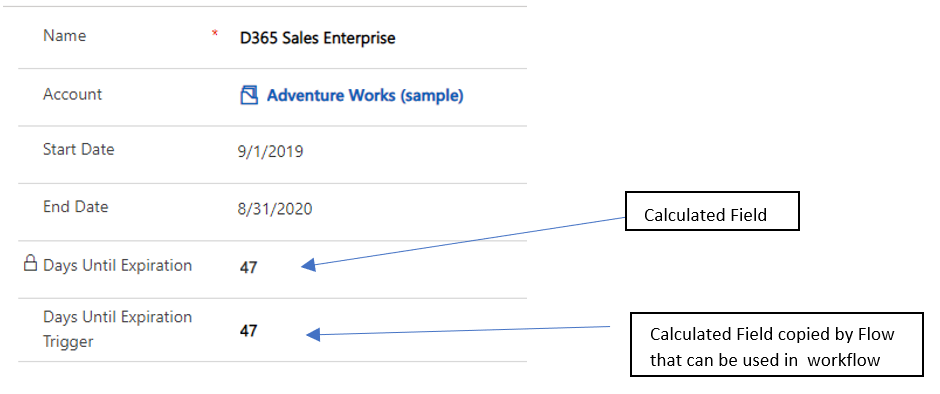
You have a custom entity called “Subscription” that has a start and end date. Our requirement is to create an opportunity using a workflow 30 days from the end date, and we want this to run in the background automatically. How do we copy this date to a “regular” field in Microsoft Dynamics CRM and trigger a workflow? We have found that a calculated field is available in a Power Automate process. And a key feature of Power Automate is that you have the option to run a flow on a scheduled basis. Running the workflow against all Subscription records where the calculated field contains data will give us the solution we need.
How to Set Up Power Automate Flows
1. Make sure Power Automate Flows are activated on your CRM. If you go to any Account record and don’t see it as a menu choice, you will need to activate this in the Power Platform Admin panel. To do this:
Go To Power Platform > Select Instance > Settings > Product > Behavior > Show Power Automate on Forms. We suggest that you also enroll in a Power Automate subscription for at least one admin account that will be used to run flows. This will give unlimited flow runs. (Yes, Microsoft meters these!)
2. In the Subscription entity, create a calculated field called Days Until Expiration to show the number of days until expiration of the subscription. We use the end date in our calculated field formula as below:

3. In the subscription entity, create a Whole Number field called Days Until Expiration Trigger. This will be used to hold the value of the calculated field and to copy the calculated field days from Step #1. You can hide this field and still use it in a workflow.
4. Next, create a three-step flow process that runs once every 24 hours (you can change this to run on any schedule you choose). This will copy the calculated field from Step #1 to the field in Step #2 as follows:
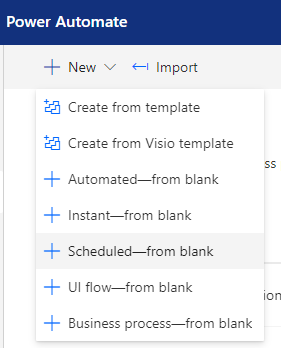
Start by creating a new flow using a schedule.
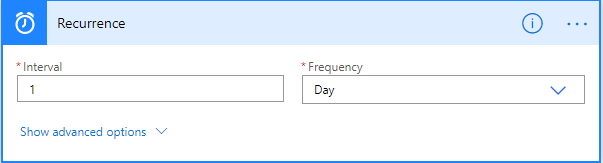
Set the required Interval and Frequency.
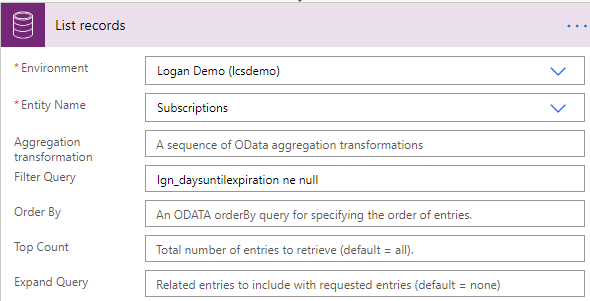
Add a Step from the common data service called “List Record” with a filter query. Use the schema name of your company and “daysuntilexpiration” in the filter query field. Click here for a good reference article on various filter queries.
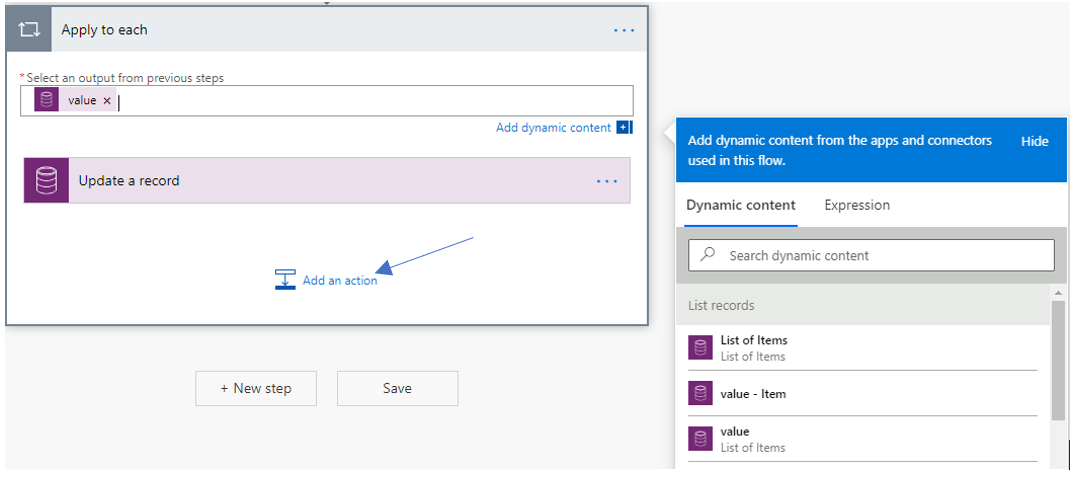
Add another Step and look for the control Apply to Each. Then place your cursor in the Select output from previous steps box. The Dynamic Content Dialog box will pop up. Select Value from the list.

Stay within this step and click on the icon Add an Action.
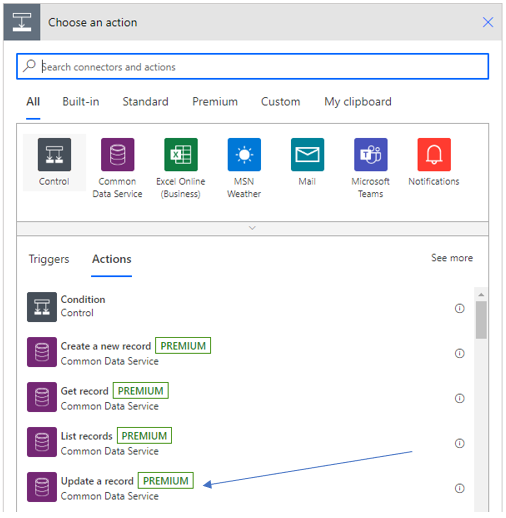
This will pop up a list of Common Data Service Actions. Select Update a Record.
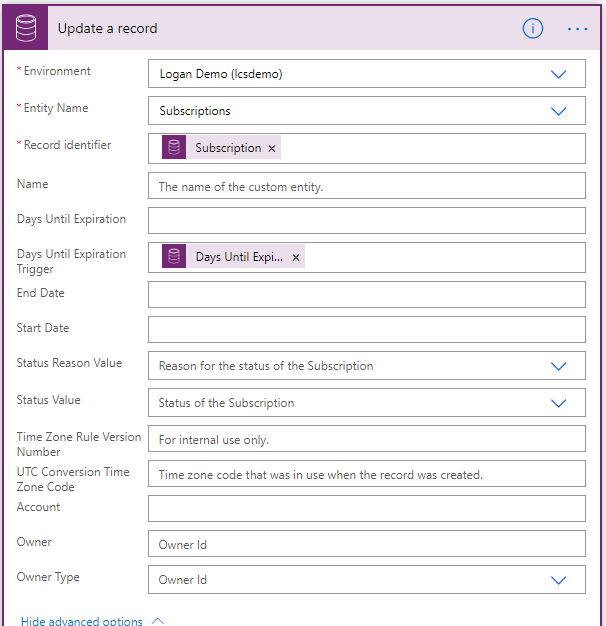
Click on the Update a Record bar and expand Advanced Options. Add the two fields from selections as noted below by placing your cursor in the box and selecting from the pop-up dialog. Note the Field selected for the Days Until Expiration trigger is the Calculated Field-Days Until Expiration. This is the key to the whole solution – Power Automate Flows exposes this field and allows copying!
Now save and test your flow to see if the flow works (Create at least one subscription record with a start and end date to test). The workflow will run every 24 hours to update all subscription records that have data in the calculated field.
Variations of This Method
1. Create the Flow to be an Instant – from Blank and add a 2nd step to directly update other fields on the record the record. The flow will trigger each time the calculated field changes for one record.
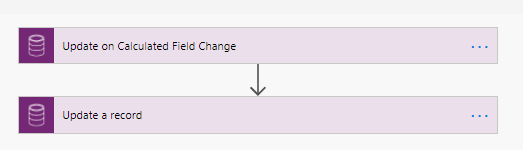
Add the necessary steps to directly update other records that an internal workflow would usually handle. This eliminates the need for other workflows. Keep in mind, the method demonstrated here to update a field is very handy to use with triggering Business rules for a form. The functionality can be applied to a roll-up field.
Next Steps
Still want to know more about how you can use Power Automate Flows to start automating complicated processes in Microsoft Dynamics CRM? Talk to us today to get an expert consultation from Logan Consulting on how you can use Microsoft Dynamics CRM to its fullest capabilities.


