How to Set up Functional Location Lifecycle States with Dynamics 365 Supply Chain Management
Posted on: July 13, 2022 | By: Guy Logan | Microsoft Dynamics AX/365, Microsoft Dynamics Manufacturing
Functional locations are used to manage assets where actual assets are installed or set up. There are many uses of functional locations. Functional locations can be user-oriented and used to manage assets that have similar behavior. They can also be workflow-oriented or represent geographical locations or sites.
A feature of functional locations includes functional location lifecycle states. Functional location lifecycle states define the states that a functional location can go through, for example, created, active, and ended. This blog describes how to set up functional location lifecycle states and lifecycle models in Asset Management. If you need additional assistance, Logan Consulting can help.

Set up functional location lifecycle states
- Select Asset management > Setup > Functional locations > Lifecycle states.
- Select New to create a new functional location state.
- Insert the state ID in the Lifecycle state field and a name for the functional location state in the Name field. In the Lifecycle models field, you can see the number of functional location lifecycle models that uses the functional location state.
- On the General FastTab, select “Yes” on the Active toggle button if the functional location should be active at this state.
- Select “Yes” on the Create assets toggle button if it should be possible to automatically create an asset with the same name as the functional location and install it on the functional location at this state.
Note
This toggle button relates to the Asset type field on the General FastTab in the Functional location types form (Asset management > Setup > Functional locations > Functional location types).
- Select “Yes” on the Rename location toggle button if it should be possible to change the name of the functional location at this state.
- Select “Yes” on the New sub locations toggle button if it should be possible to add new sub locations to the functional location at this state.
- Select “Yes” on the Install assets toggle button if it should be possible to install assets on the functional location at this state.
- Select “Yes” on the Delete functional location toggle button if it should be possible to delete the functional location at this state.
- Select an asset state in the Lifecycle state field if you want the asset lifecycle state for all assets installed on the functional location to be automatically updated at this state. Example: If you close down a functional location, and set the functional location lifecycle state to “Ended”, you may want to automatically change the lifecycle state of the assets installed on that functional location to “Not in use”.
Note: Functional location lifecycle states, lifecycle models, and types are related and used in the same way as work order lifecycle states, work order lifecycle models, and work order types.
Set up functional location lifecycle models
When you have created the lifecycle states required for your functional locations, they can be divided into groups. This is done to create the lifecycle model flow that may be used for different types of functional locations. As a minimum, one standard functional location lifecycle model should be created.
- Select Asset management > Setup > Functional locations > Lifecycle models.
- Select New to create a new lifecycle model.
- Insert the lifecycle model ID in the Lifecycle model field and a name for the lifecycle model in the Name field. In the Functional location types and Lifecycle states fields, you can see the number of functional location types that uses the lifecycle model and the number of states selected in the lifecycle model.
- On the Lifecycle states FastTab, select the states that should be included in the model. This is done by clicking on a state in the Lifecycle states remaining section and clicking the
 button.
- If you want to select all the available states for a model, click the
 button. All states are transferred to the Lifecycle states selected section.
- If you want to remove a selected state from the model, select the state in the Lifecycle states selected section and then select the
 button.
- Select Lifecycle state updates to define which lifecycle states can follow a selected state.
Next Steps
If you are interested in learning more functional location lifecycle states using Microsoft Dynamics 365 for Supply Chain Management, contact us here to find out how we can help you grow your business. You can also email us at info@loganconsulting.com or call (312) 345-8817.
Related Posts
-
Posted on: June 11, 2026
[embed]https://youtu.be/f8S_rP0a_ig?si=FvTrvIIrKlFKw2cO[/embed] The 2025 release wave 2 for Dynamics 365 Finance covers the new functionality Microsoft delivered to market between October...
Read More ›
-
Posted on: June 9, 2026
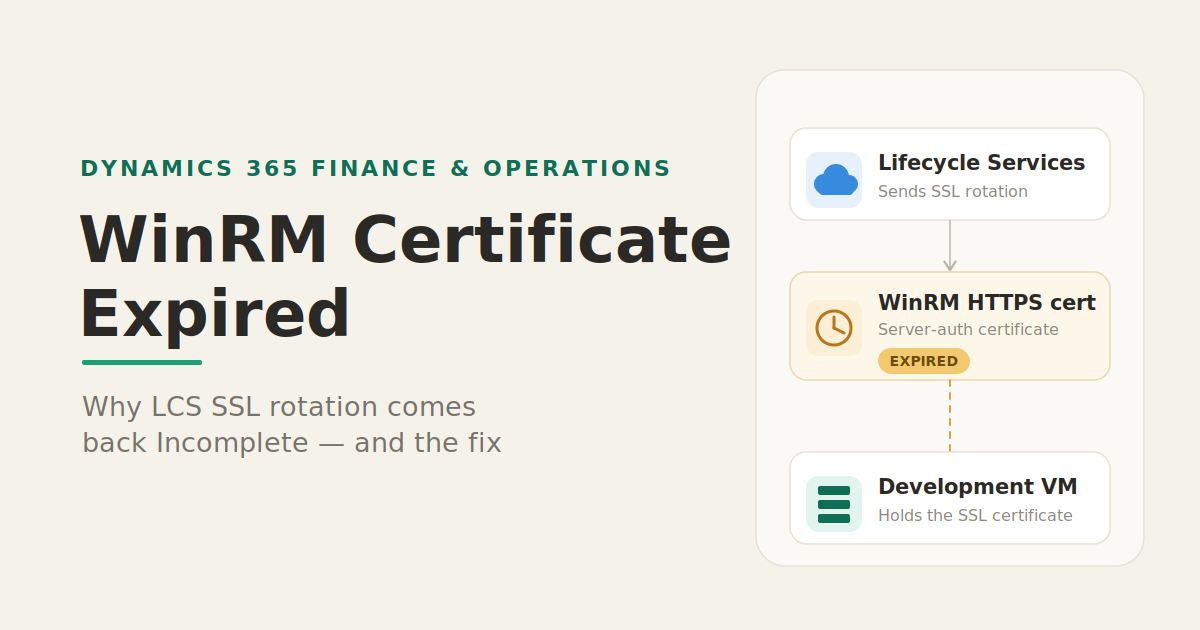
Every so often, a Dynamics 365 Finance & Operations development VM reminds us that certificates are like milk: they expire...
Read More ›