


Reviews and corrects ledger-to-subledger alignment in D365 by fixing posting configurations, inventory profiles, reconciliation logic, GL mapping, and critical reporting procedures.
Dynamics 365 for Financials – Issue and Void Checks
Posted on: July 5, 2017 | By: Jim Bertler | Microsoft Dynamics Business Central
Dynamics 365 for Financials supports the issuing of both electronic and manual checks. Both methods use the payment journal to issue checks to vendors. Users can also void checks and view check ledger entries.
The process of issuing checks suggests payments, creates ledger entries, and prints the computer checks.
Before issuing checks, the check printer must be correctly set up with the check forms, and a user must define which check layout to use. Once this has been settled, checks can be issued.
To issue checks:
-
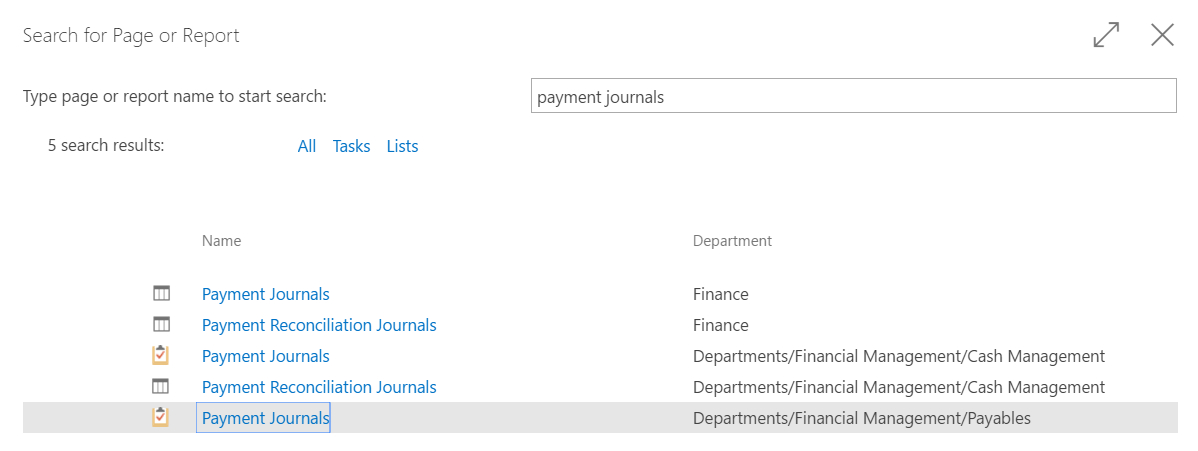
In the top right corner, choose the Search for Page or Report icon, enter Payment Journals, and then choose the related link. For this example, the payables payment journal task will be selected.
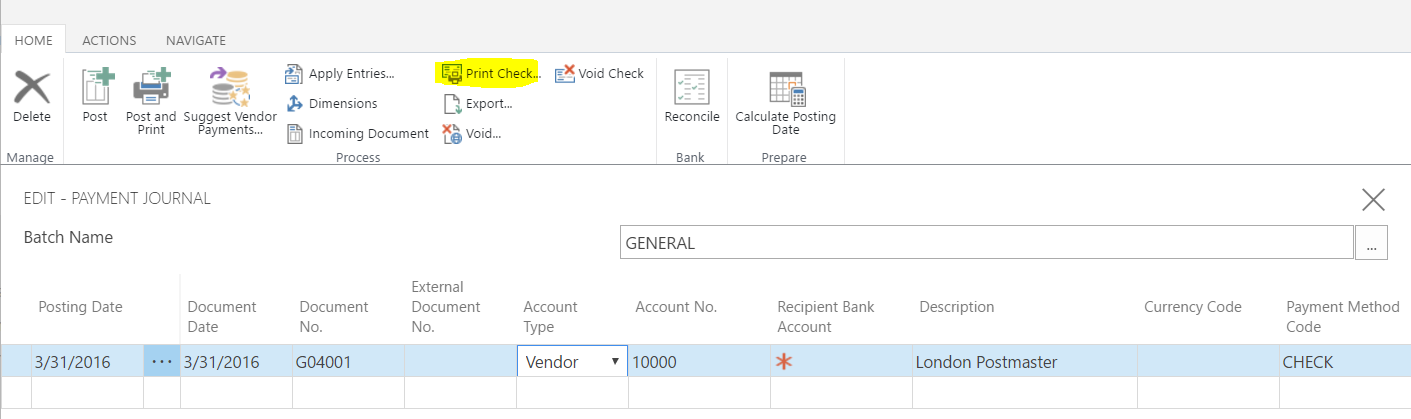
2. Fill in the journal with relevant payments. This can be done manually or by using the Suggest Vendor Payments function. Relevant fields to input include (but are not limited to):
-
Posting Date
-
Document Date and No.
-
External Document No.
-
Account Type (Vendor, G/L, Customer, etc.) and No.
-
Recipient Bank Account
-
Payment Method Code
-
Amount
-
Balancing Account Type and No.
-
Applies-to Doc Type and No.


3. In the Bank Payment Type field on journal lines for payment to make with checks, select one of the following options:
-
Computer Check: Select this option to print a check for the amount on the payment journal line. The checks must be printed before posting the journal lines. Computer Check can only be selected if the Bal. Account Type or the Account Type is Bank Account.
-
Manual Check: Select this option if a check was created manually to create a corresponding check ledger entry for this amount. By using this option, checks cannot be printed from Financials. Manual Check can only be selected if the Bal. Account Type or the Account Type is Bank Account.
4. In case of computer checks, choose Print Check.
5. In the Check window, fill in the fields as necessary. Choose a field to read a short description of the field or link to more information.
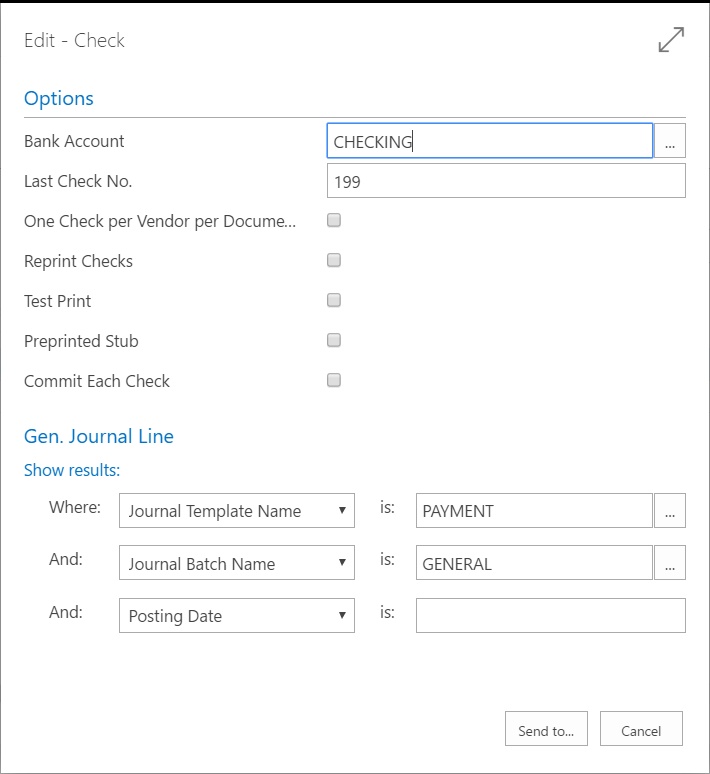
6. Close the Print button.
To cancel printed checks that are not posted:
A user can cancel non-posted checks after they have been printed by using the Void Check action in the Payment Journal window. In the Payment Journal window, choose the Void Check, and then choose which checks to cancel.

To void checks:
When checks have been posted, a user can only void checks from the resulting bank ledger entries.
-
In the top right corner, choose the Search for Page or Report icon, enter Bank Accounts, and then choose the Finance link.

2. Select the relevant bank account, choose the Edit action, and then choose the Check Ledger Entries action.

3. In Check Ledger Entries window, choose the Void Check action.
4. Select the Void Check Only check box.
5. Choose the OK button.
For further insight on Microsoft Dynamics 365 installation and implementation, contact Logan Consulting, your Microsoft Dynamics 365 Partner of Chicago.


