


Reviews and corrects ledger-to-subledger alignment in D365 by fixing posting configurations, inventory profiles, reconciliation logic, GL mapping, and critical reporting procedures.
Acumatica ERP – Preparing and Uploading the Chart of Accounts
Posted on: May 11, 2017 | By: Jim Bertler | Acumatica
After configuring the company in Acumatica ERP and before beginning use of Acumatica ERP for financial accounting, the chart of accounts must be defined in the system. This article will detail how to setup the chart of accounts and upload it into Acumatica.
Prepare the Chart of Accounts:
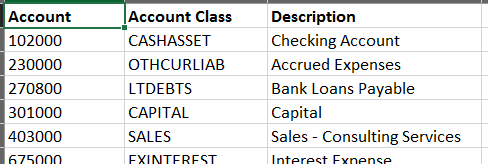
A user can upload the chart of accounts to the system from a Microsoft Excel file. The first worksheet lists the accounts that are going to be used.
-
Use the first worksheet of the Microsoft Excel file for the chart of accounts.
-
In the first row of the worksheet, specify the column captions:
-
Account (the account identifier, which can be up to 10 alphanumeric characters)
-
Account Class
-
Description
-
-
In the next rows, list the accounts to upload. The chart of accounts holds the general ledger (GL) accounts defined in the system. Acumatica ERP supports four types of GL accounts: asset, liability, income, and expense. In each type, the accounts are also divided into classes. When the chart of accounts is uploaded (as described in the next step), a user must specify the account class for each account. Account classes are used for convenient grouping and sorting of data in reports and inquires. By default, the system provides predefined account classes that accommodate most reporting needs, although you can define additional account classes. If you have correctly specified the account class in the chart of accounts, the system will automatically determine the account type (Asset, Liability, Income, or Expense). A list of predefined account classes can be viewed on the Account Classes (GL202000; Finance > General Ledger > Configuration > Setup) form.
Upload the Chart of Accounts to the System:
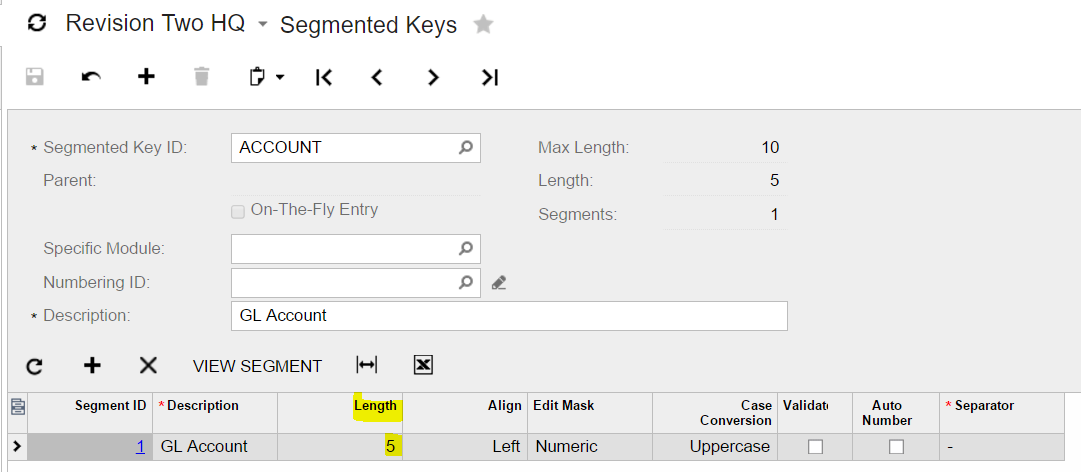
Before uploading the chart of accounts, on the Segmented Keys (CS202000; Configuration > Common Settings > Segmented Keys) form, select the ACCOUNT segmented key in the Segmented Key ID box and set the Length of the GL Account segment to the relevant number. Users can use account identifiers that are no longer than the specified length. Once any transaction has been posted to an account, the segment length should not be decreased, because a decrease could result in the duplication of existing identifiers.
To upload the chart of accounts, open the Chart of Accounts (GL202500; Finance > General Ledger > Configuration > Manage) form and do the following:
-
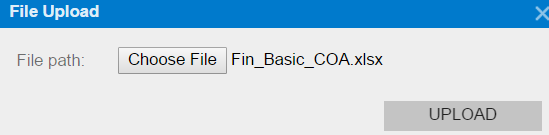
Click the Load Records from File button on the form toolbar.
-
Select the Excel file and click Upload.
-
Leave Null Value empty and click OK.
-
In the Columns window, make sure the columns are mapped to account parameters as shown in the screenshot below.
-
Click OK to upload the records, and then click Save to save them to the database. The initial chart of accounts is uploaded to Acumatica ERP.

For more information on installation and implementation contact Logan Consulting for your free consultation now!


