Dynamics 365 for Financials – Create a Drop Shipment
Posted on: July 31, 2017 | By: Jim Bertler | Microsoft Dynamics Business Central
Authored by: Brent Stabiner
A drop shipment is the shipment of items from one of the vendors directly to one of the customers. When a sales order is marked for drop shipment, and a purchase order is created specifying the customer in the Sell-to Customer No. field, the two documents can be linked and thereby instruct the vendor to ship directly to the customer.
To create a sales order for drop shipment:
-
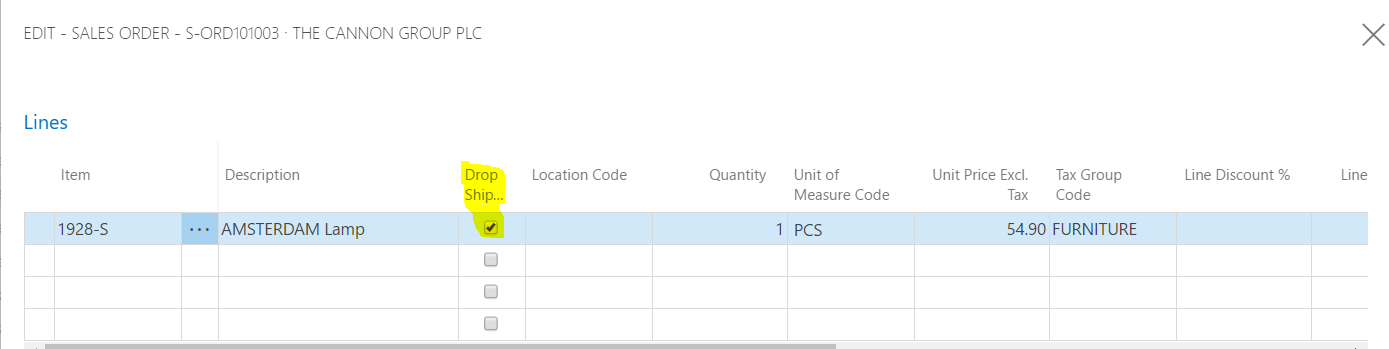
Create a sales order for an item.
-
On the sales order line for the drop shipment, select the Drop Shipment check box. Use the Choose Columns function if the field is not visible.
To create the purchase order for drop shipment:
-
Create a purchase order. Do not fill any fields on the lines.
-
In the Sell-to Customer No. field, select the customer that you are selling to.

3. Choose the Drop Shipments action, and then choose the Get Sales Order action.

4. In the Sales List window, select the sales order that you prepared in the “To create a sales order for drop shipment” section.
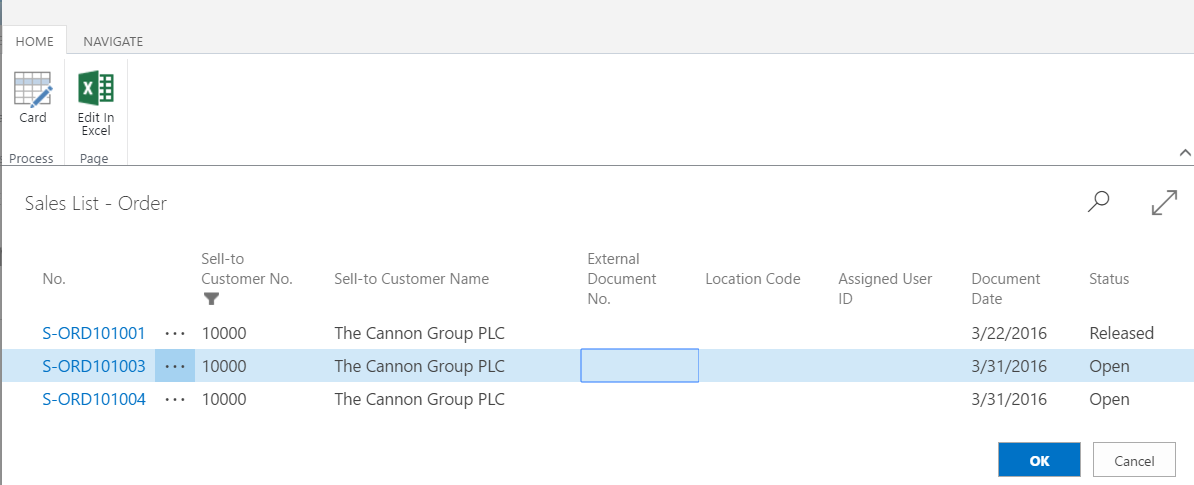
5. Choose the OK button. The line information from the sales order is inserted on the purchase order line(s).
To view the linked purchase order from the sales order:
-
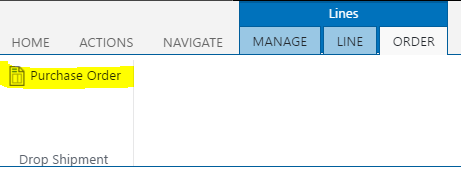
Select the drop-shipment sales order line, choose the Order action, choose the Drop Shipment action, and then choose the Purchase Order action.
To post a drop shipment:
-
In the top right corner, choose the Search for Page or Report icon, enter Sales orders, and then choose the related link.
-
Open the sales order that you created in the “To create a sales order for a drop shipment” section.
-
In the Qty. to Ship field, specify how many of the order quantity to ship, the full or a partial order quantity.

4. Choose the Post or Post and Send action.
5. Choose either the Ship option to invoice later, or the Ship and Invoice option to invoice immediately.
For further insight on Microsoft Dynamics 365 installation and implementation, contact Logan Consulting, your Microsoft Dynamics 365 Partner of Chicago.