Scheduled Payments in Microsoft Dynamics GP
Posted on: May 8, 2017 | By: Jim Bertler | Microsoft Dynamics GP
Scheduled payments are not used extensively in Microsoft Dynamics GP, but they can be quite helpful. Any time a company needs to set up invoices or loans in payables that are paid in installments, then scheduled payments can be utilized. They are available in both the receivables and payables management modules and work similarly in both. This post will look at the feature in Payables Management.
The first step is to find an open/unpaid invoice or loan in payables against which to create the schedule. To create a schedule:
-
Navigate to Purchasing – Transactions – Scheduled Payments
-
Select the original document that will form the basis of the schedule, and then enter additional information:
-
Schedule Document Date: This will be used for the credit memo to offset the original document.
-
Schedule Amount: This will be the portion of the selected document to be moved to the Payables Offset account specified below
-
Posting Accounts: When the schedule posts, it will move the schedule amount from Accounts Payable to the Payables Offset. As each individual scheduled invoice is posted, it will attribute the appropriate amount to Interest Expense and move the invoice amount from the Payables Offset back to Accounts Payable.
-
Schedule Interest Rate: If you want the schedule to calculate and post interest expense, enter the rate here. You can also specify if the interest is compound or simple.
-
Number of Payments
-
Payment Frequency
-
-
Click “Calculate” and the system will calculate the payment amount based on the settings above
-
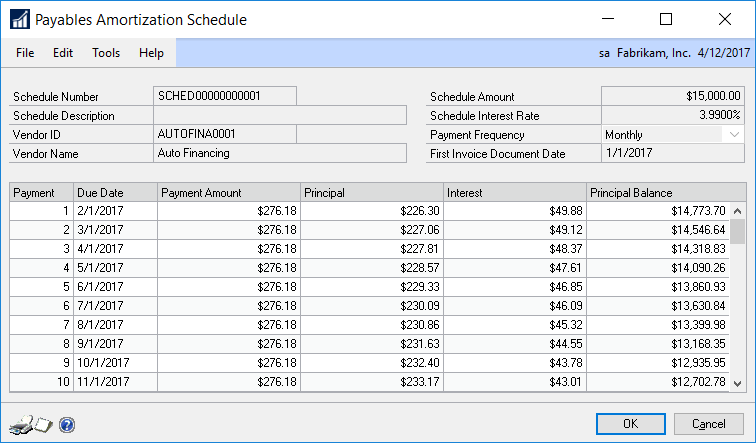
Click “Amortization” to view, and possibly edit, the created Amortization Schedule.
-
If there is a Schedule Interest Rate, then the payment amounts displayed here cannot be edited. However, if there is no Schedule Interest Rate, a user can adjust the payment amounts to meet the company’s specific needs. Simply click in the Payment Amount field and adjust as needed.
-
Click OK to return to the Payables Scheduled Payments Entry window. Click “Save” to save the schedule for review or “Post” to post the schedule and create the individual scheduled transactions. When the schedule is posted, the original invoice is credited for the amount of the schedule and individual scheduled invoices are created for posting based on payment number and frequency.
-
Even after the schedule has been posted, a user can return to the Payables Scheduled Payments Entry window to view the schedule, although the information you can modify is limited.
-
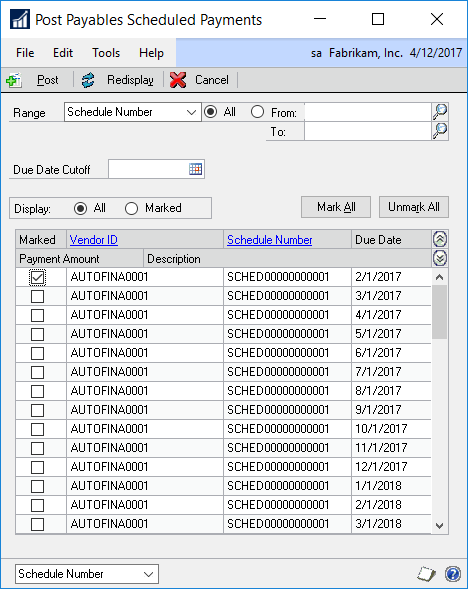
To view the created scheduled invoices, navigate to the Post Scheduled Payments window at Purchasing – Routines – Post Scheduled Payments.
-
Post the individual invoices created as needed based on the dates and frequency of the schedule. Mark the checkbox for the invoices you wish to post, then click “Post” at the top of the window.

For more questions about Microsoft Dynamics GP contact Logan Consulting your Microsoft Dynamics Gold Partner of Chicago for further inquiries.